
- Before you start
- Step 1: Open APIs & Services
- Step 2: Click "Enable APIs and services"
- Step 3: Find the Routes API
- Step 4: Enable the Routes API
- Step 5: Create a new API key
- Step 6: Name the key and limit it to the Routes API
- Step 7: Leave application restrictions set to "None"
- Step 8: Copy your new key
- Step 9: Add the key to Kikote
- Test your shipping
Google has deprecated the Distance Matrix API, which Kikote used to work out the distance between your store and your customer for Cost by Distance shipping. Google will switch it off in the future, so Kikote now supports the newer Routes API. This guide shows you how to create a Routes API key in Google Cloud and add it to Kikote.
Before you start #
- You need a Google Cloud account and a project with a billing account attached. If you already set up the Distance Matrix API for Kikote, you can use that same project.
- The whole process takes about five minutes.
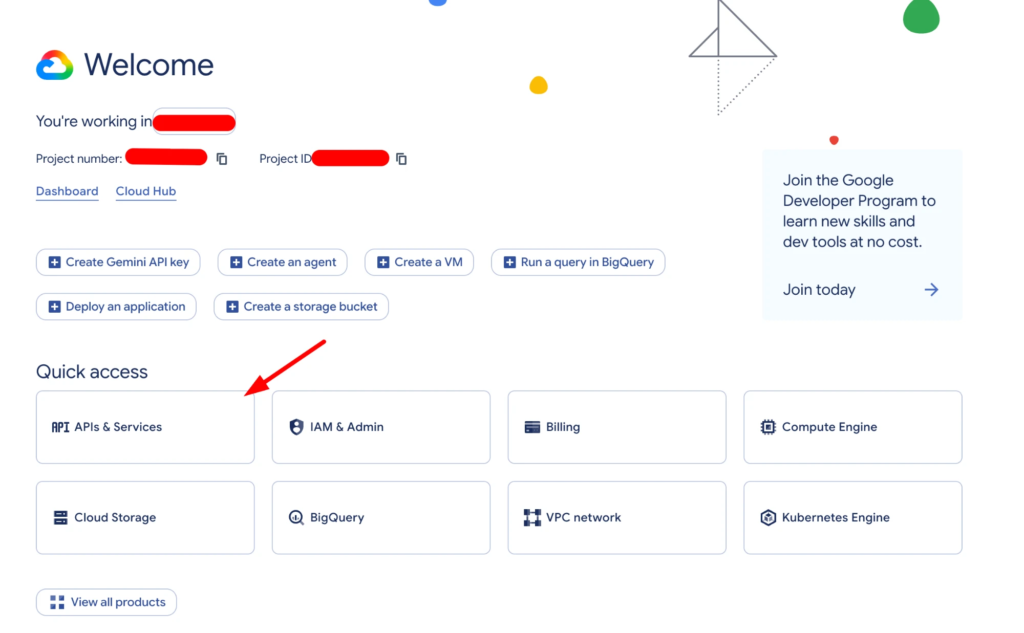
Step 1: Open APIs & Services #
Sign in to the Google Cloud Console at console.cloud.google.com and make sure the correct project is selected at the top of the page. Under Quick access, click APIs & Services.
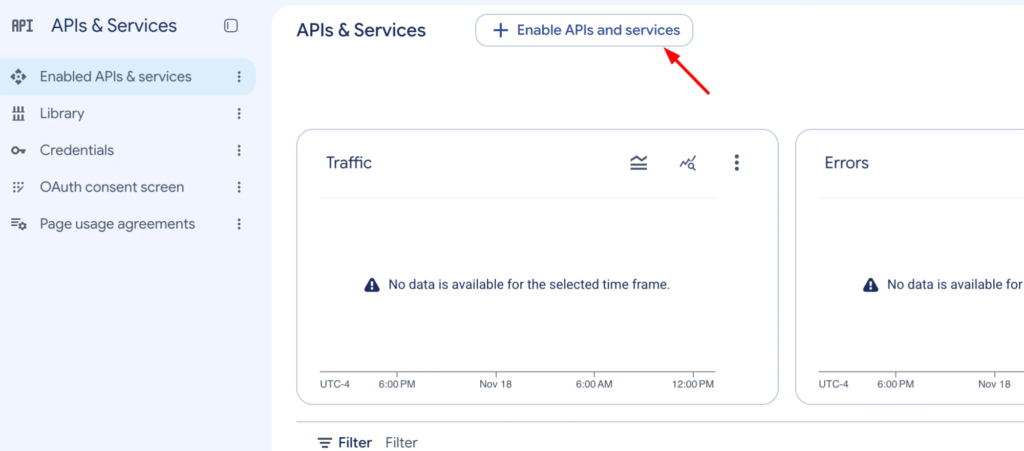
Step 2: Click “Enable APIs and services” #
At the top of the APIs & Services page, click + Enable APIs and services. This opens the API Library.
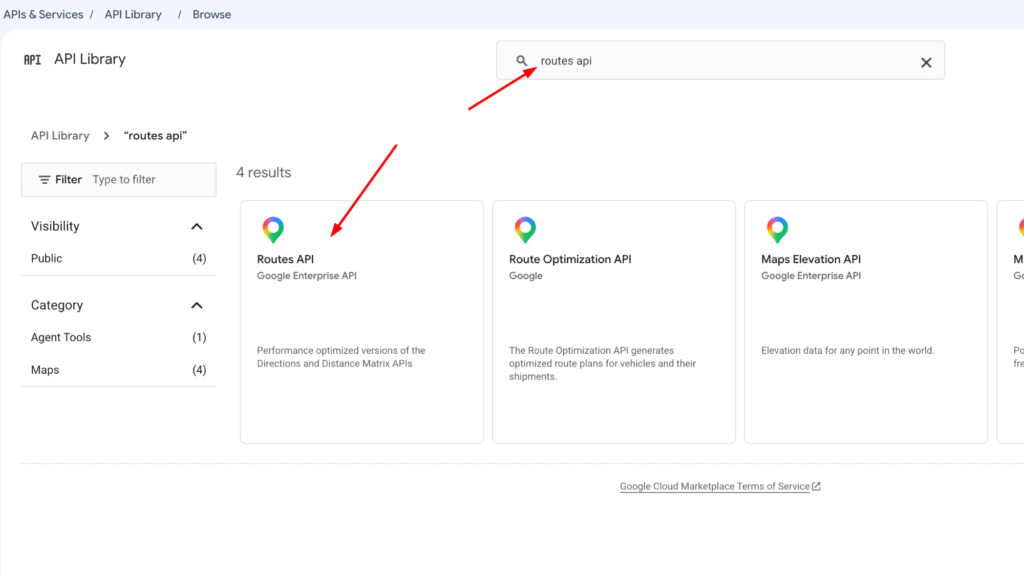
Step 3: Find the Routes API #
Type routes api into the search box and press Enter. Click the Routes API result (Google Enterprise API). Be careful not to pick “Route Optimization API”, which is a different product.
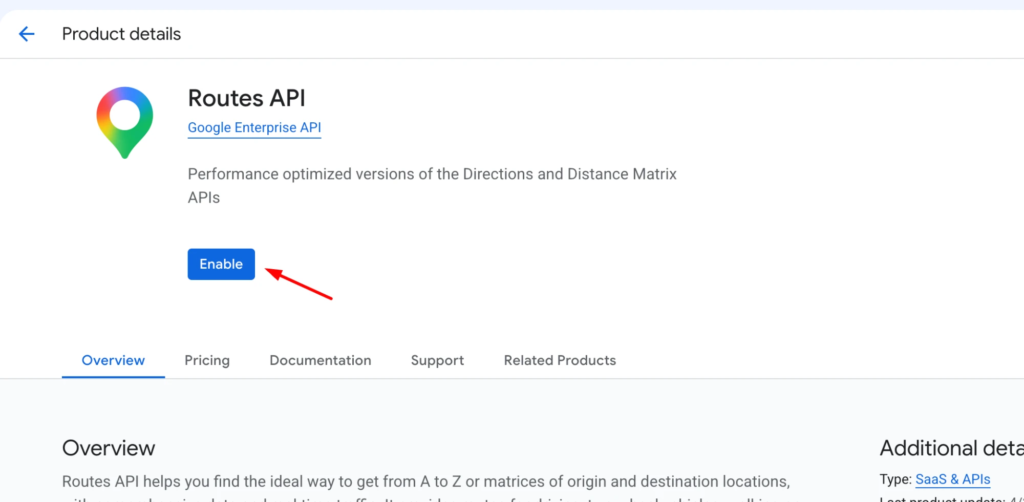
Step 4: Enable the Routes API #
On the Routes API product page, click Enable. Wait a few seconds for Google to turn it on for your project.
Step 5: Create a new API key #
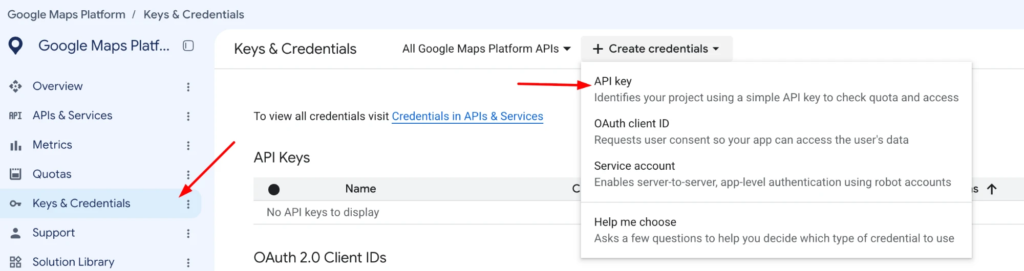
Go to Google Maps Platform > Keys & Credentials from the left menu. Click + Create credentials at the top of the page, then choose API key.
Step 6: Name the key and limit it to the Routes API #
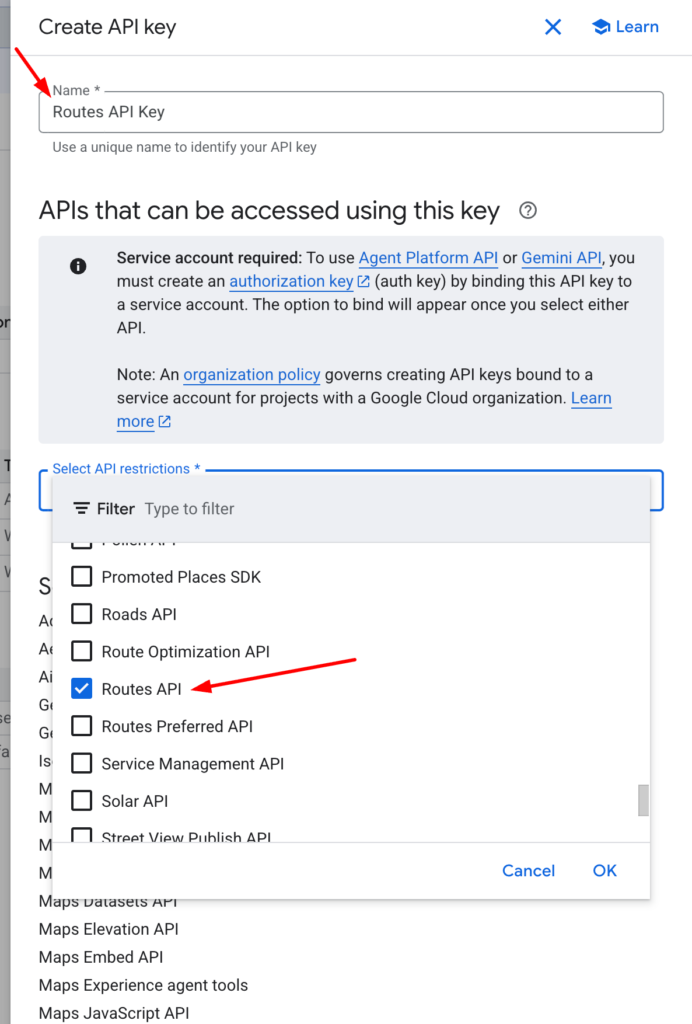
Give the key a name you will recognise later, such as Routes API Key. Then open the Select API restrictions dropdown, untick all other options and tick ONLY Routes API and click OK. This means the key can only be used for the Routes API, which keeps it safer if it ever leaks.
Step 7: Leave application restrictions set to “None” #
Check that Selected APIs shows Routes API. Under Application restrictions, leave None selected, then click Create at the bottom of the form.
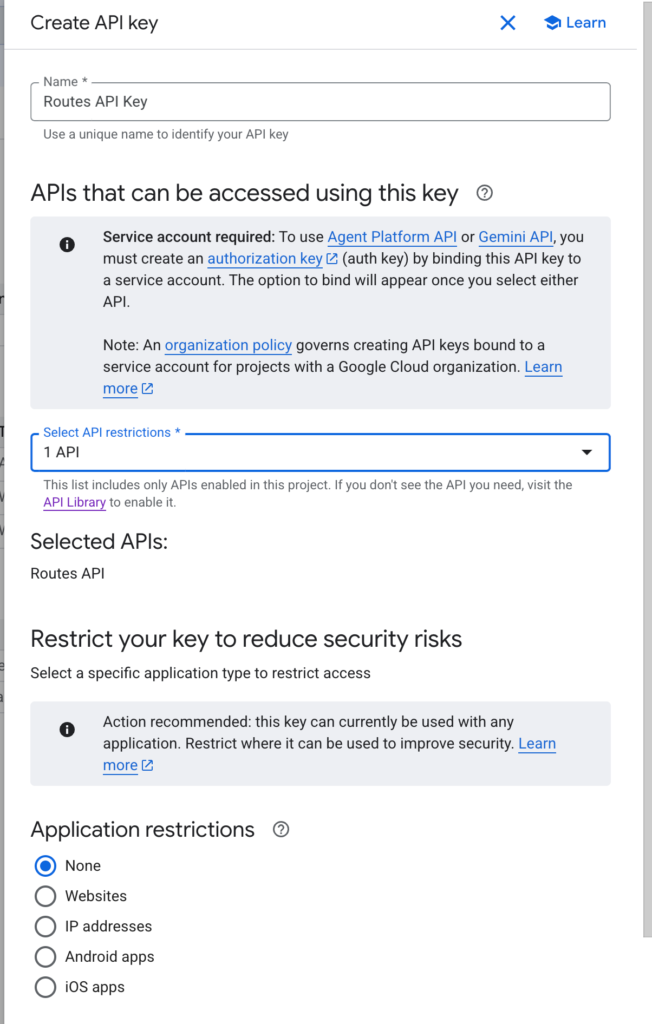
Why "None"? Kikote calls the Routes API from your web server, not from the customer's browser. A Websites restriction would block those requests and your distance shipping would stop working. If your host gives your server a fixed IP address, you can choose IP addresses and enter it instead.
Step 8: Copy your new key #
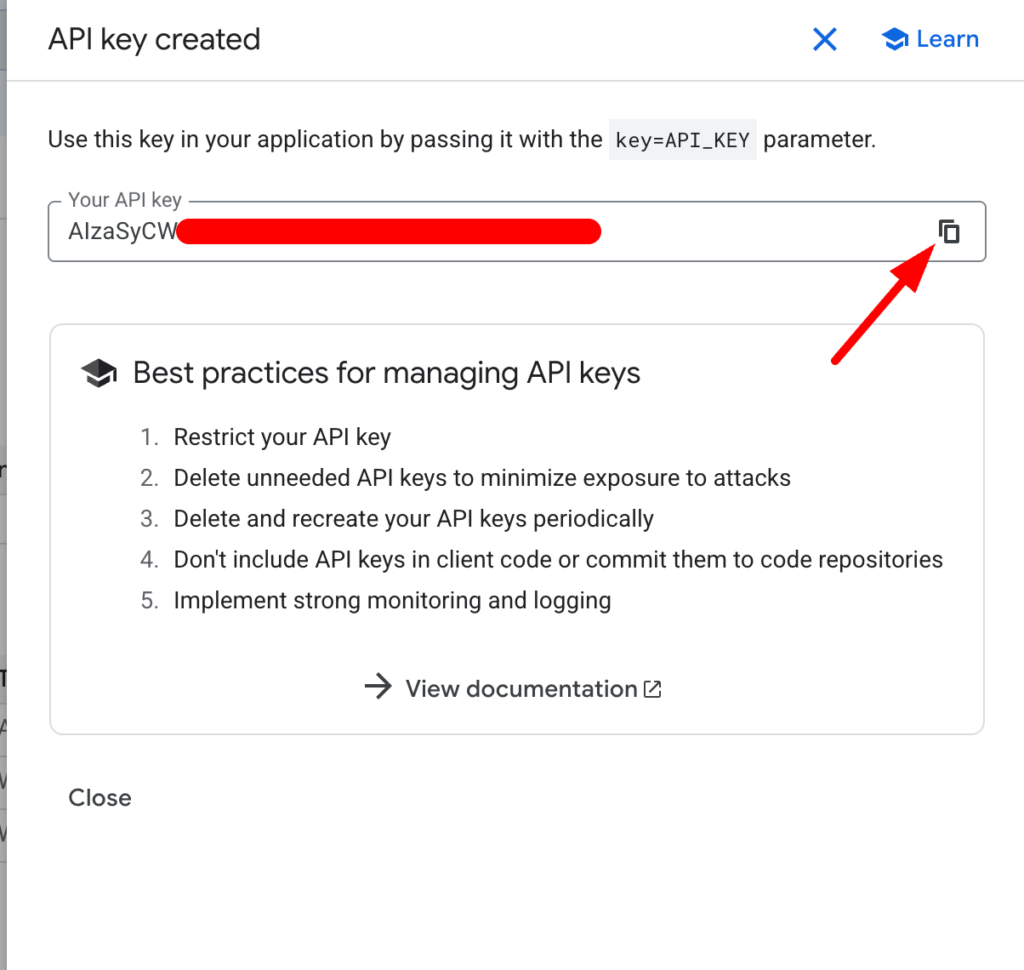
Google shows your new key in an API key created window. Click the copy icon next to the key. Keep the key private and do not share it publicly.
Step 9: Add the key to Kikote #
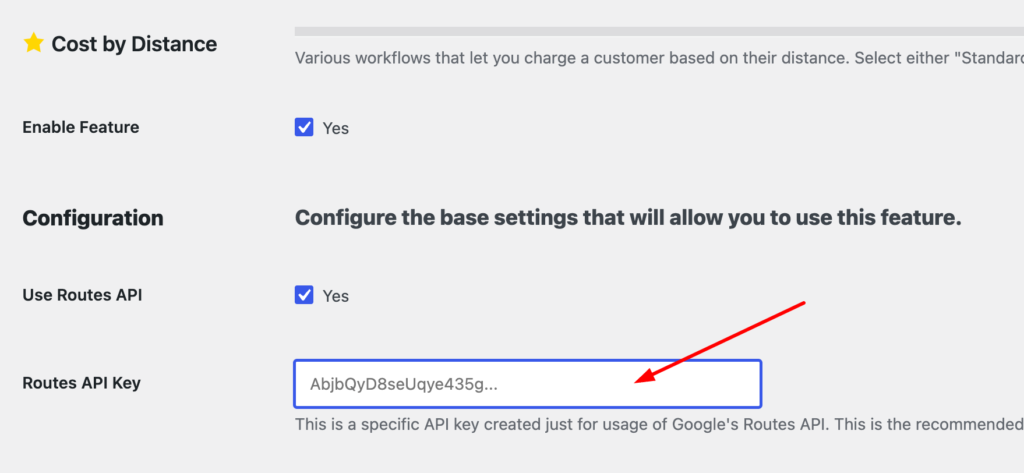
In your WordPress dashboard, go to SoaringLeads > Kikote – Location Picker at Checkout and open the Shipping tab. In the Cost by Distance section:
- Tick Use Routes API.
- Paste your key into the Routes API Key field.
- Click Save changes at the bottom of the page.
Test your shipping #
Add a product to your cart, go to the checkout page and pick a delivery location on the map. Your Cost by Distance shipping rate should update just like before. Once Kikote is using the Routes API with a saved key, the Distance Matrix deprecation notice in your dashboard also goes away.
If the shipping cost does not appear, check that the Routes API is enabled in the same Google Cloud project as your key, that billing is turned on for that project, and that the key has no Websites restriction. Still stuck? uncheck the Use Routes API to go back to using Distance Matrix API as before, then Contact support and we will help you get Routes API working.


