WooCommerce Shipping Zones: A Complete Guide
Do you own a global business with different customer bases and unique shipping needs? Then you’d want to set up flexible shipping options for each geographical location you service. WooCommerce shipping zones can help you achieve this effortlessly. They offer an easy-to-use avenue to take WooCommerce shipping automation to the next level.
Shipping is a very important part of any eCommerce business that sells physical products. This is particularly true if you ship worldwide or to different states in the same country. In this case, it’s important to get things like shipping costs, delivery times, and even shipping carriers right. Your goal should be to offer the most relevant shipping options for every customer, irrespective of their location.
WooCommerce shipping zones make it very easy to restrict shipping methods and other options to your customers based on their geolocation. This makes managing your global business much easier.
If you’re new to shipping zones, this article will cover everything you need to know about this powerful WooCommerce feature. You’ll learn:
- What are WooCommerce Shipping Zones and how they work
- How and when to use a WooCommerce Shipping Zones
- The relationship between WooCommerce Shipping Zones and WooComemrce Shipping Methods
Let’s get to it!
- What are Shipping Zones in WooCommerce?
- How WooCommerce Shipping Zones Work
- When to Use Shipping Zones
- How to Set Up a WooCommerce Shipping Zone
- What Is the Relationship Between Shipping Zones and Shipping Methods?
- How to Display Shipping Costs by Region (Shipping Zone)
- Getting Started With WooCommerce Shipping Zones
What are Shipping Zones in WooCommerce?
Put simply, a WooCommerce shipping zone is a cluster of geographical locations you want to ship your products to. It may be a group of cities, states, or even countries. You can group ZIP or postal codes and add them to a shipping zone. The main idea behind this is to assign the same shipping options and methods to the locations in this zone.
Interestingly, you can even exclude all the locations in a WooCommerce shipping zone from shipping completely. You can also use zones to enable shipping for only the locations in a zone. This is an effective way to offer your store visitors flexible shipping options based on their geographical location.
Displaying shipping information based on a buyer’s location helps to streamline their shopping experience. Among other benefits, they’ll now see more accurate shipping costs, more reliable delivery time estimates, and only the shipping carriers that actually cover their region.
Without shipping zones, all your customers would see the same shipping options, regardless of their location. This can be very inefficient and unreliable. WooCommerce shipping zones solve this problem by letting you set up flexible shopping options like:
- A flat shipping rate for all customers in a specific region
- Adding a local carrier that only ships to a particular geolocation to your store
- Offering all customers within your physical store’s region free shipping
If used properly, WooCommerce shipping zones can be the ace in the hole for your shipping strategy. They help you to manage shipping costs and delivery times more efficiently. Your customers will also be more satisfied since they know they’re paying a fair shipping price and will get their shipment at the expected time.
But how do shipping zones work in WooCommerce? Let’s take a look!
How WooCommerce Shipping Zones Work
The science behind WooCommerce shipping zones begins with detecting a customer’s geolocation. Like most other web frameworks, WordPress has the capacity to determine your site visitor’s location. The user’s browser uses information from different sources to track where a user is visiting your site from.
These sources could be the GPS (on mobile devices), IP address, or even WiFi and Bluetooth information. Once the browser detects the location information, WordPress and WooCommerce can then access this information. The next thing WooCommerce does is assign that browser session to the appropriate shipping zone. Of course, this is based on the zones you’ve defined earlier.
As we previously mentioned, shipping zones in WooCommerce can include countries, cities, or postal/ZIP codes. After assigning the shipping zone, WooCommerce then offers all the shipping methods and options you’ve configured for that shipping zone on the checkout page when a customer is placing an order.
As a site owner, the major task you’ll have to deal with is adding locations to the shipping zones accurately. The browser and WooCommerce will take care of the rest. Setting up shipping zones can affect critical factors like shipping costs, which can impact customer satisfaction significantly.
To set up shipping zones more accurately, you can use a location picker plugin like Kikote to draw custom shipping regions. You can then assign a name and shipping cost to every region. The good thing is you can even display a map on the checkout page with a unique background color assigned to each shipping zone.
This is a very illustrative way to showcase your store’s shipping zones to your buyers. They get to calculate their fees upfront and also gain an idea of the exact service they’re paying for.
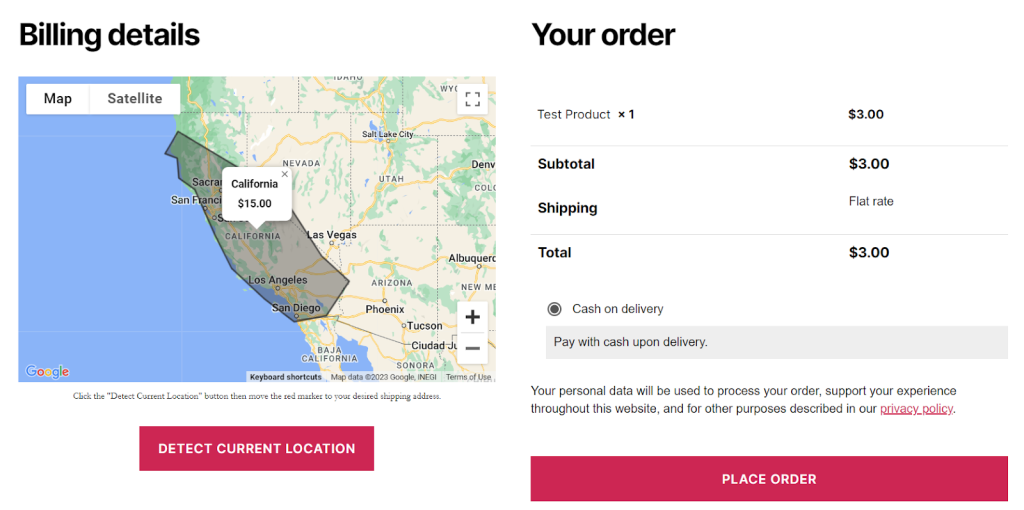
In the end, what you get is that your store customers now see accurate shipping options and costs based on their location.
When to Use Shipping Zones
Shipping zones offer tremendous flexibility for online store owners. They offer a very easy way to manage international shipping, irrespective of your business size or store type. Here are a few popular use cases:
- International eCommerce: If you sell products worldwide, then WooCommerce shipping zones can help streamline your logistics. They allow you to automatically set different shipping rates and methods based on individual customers’ countries. Without any additional input, your site can now calculate shipping costs, and determine payment methods and other options for customers worldwide.
- Local/regional businesses: Local businesses aren’t left out either. For an enhanced shipping experience and depending on your business needs, you can also set up smaller zones within specific states.
- Restaurants, grocery, or food delivery services: Food and grocery delivery services are often highly restricted. With shipping zones, you can exempt specific neighborhoods or ZIP codes from delivery to ensure timely and efficient service.
- Location-based conditional shipping: You can incentivize purchases from certain countries or locations where your store sales are dropping by offering temporary free shipping there. Another popular use case is providing free or discounted shipping for customers within your local vicinity. This makes sense since shipping costs are generally lower in this case. It’s also a good way to drive customer loyalty and support your local community.
Common advantages of using WooCommerce shipping zones include:
- They help you to apply accurate and transparent shipping costs based on a customer’s location.
- You get to offer only relevant and efficient shipping methods or carriers.
- Your delivery time estimates are optimized and more accurate.
- You can target specific customer bases with free and discounted shipping offers.
- Shipping zones make it easier to expand your business to more countries.
- They enhance the shipping experience for your global customer base.
Now that we understand the most popular shipping zone use cases and their benefits, let’s explore how to set one up in WooCommerce.
How to Set Up a WooCommerce Shipping Zone
Now, it’s time to set up WooCommerce shipping zones. This feature is a built-in functionality that ships with the WooCommerce plugin. So, all you need to have access to it is to get WooCommerce.
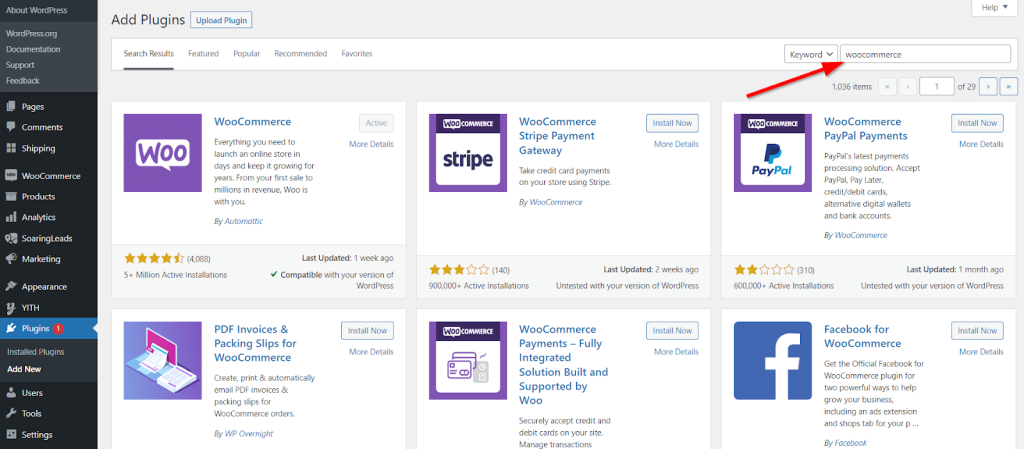
If you don’t already have WooCommerce, simply go to Plugins > Add New and search for ‘woocommerce’. When you find the plugin, click Install Now followed by Activate. As you can see, it’s already active in my store.
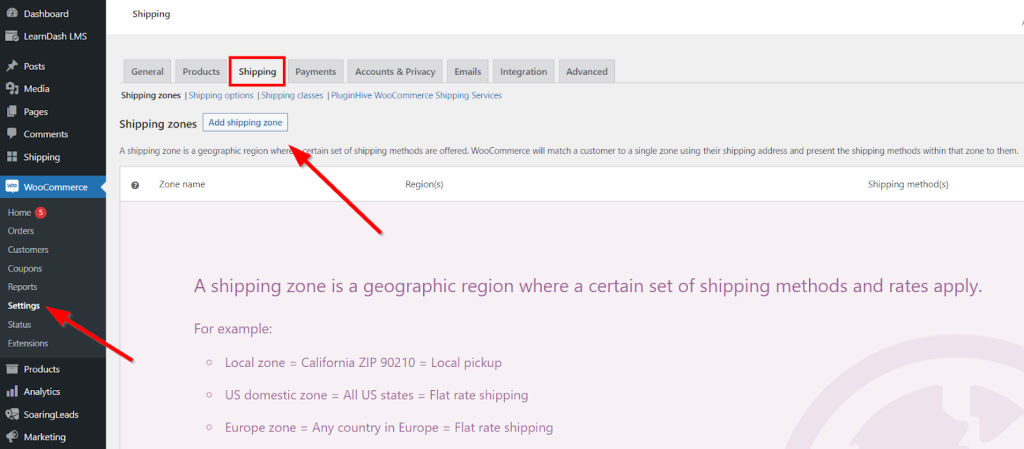
Next, head over to WooCommerce > Settings > Shipping. The first thing you’ll need to do before configuring any shipping settings is to create a shipping zone. WooCommerce doesn’t come with any default zone. Click Add shipping zone to create the first one.
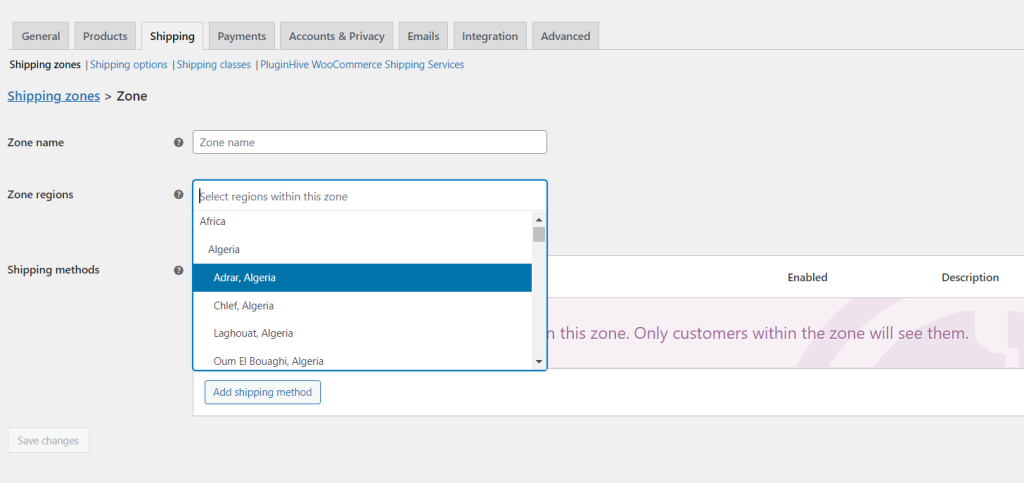
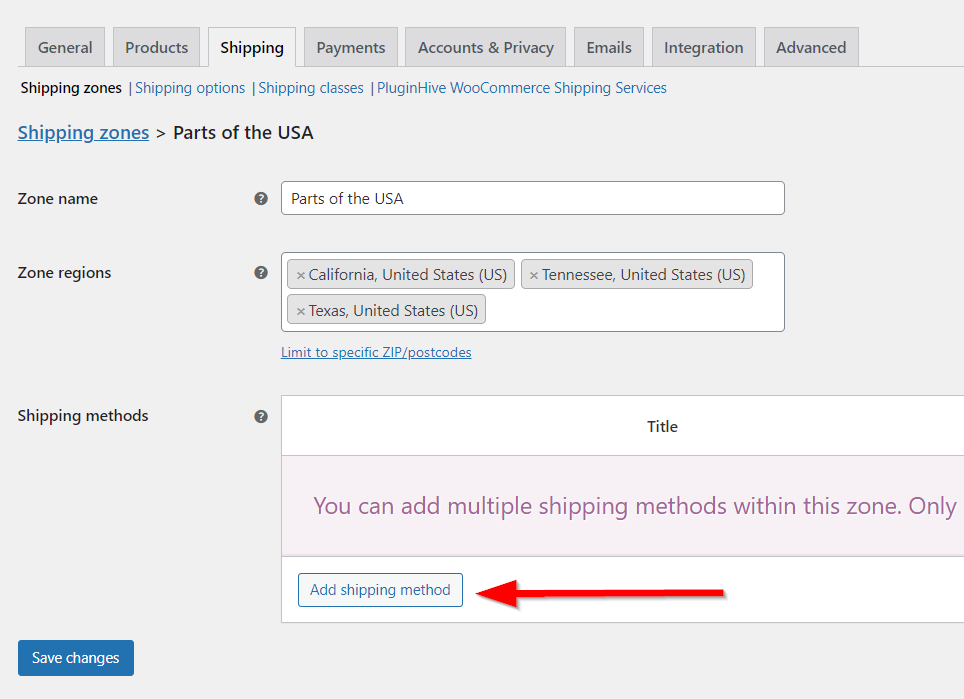
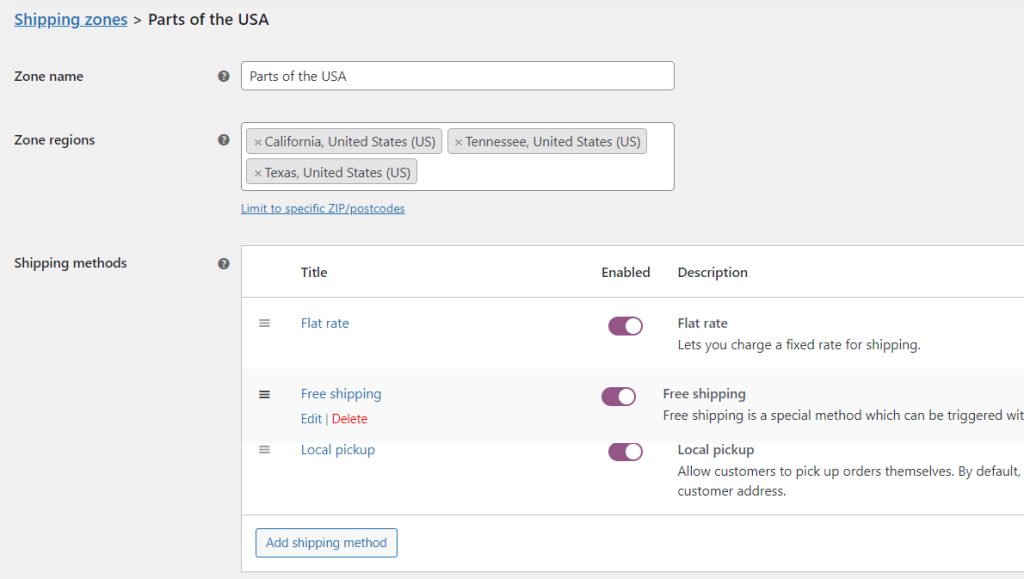
Now, add a name to your new shipping zone and all the regions you want to add to it. You can search for cities, states, countries, and multiple ZIP codes.
After adding all the necessary locations, it’s time to assign shipping methods and options to our new WooCommerce shipping zone. To do this, click Add shipping method.
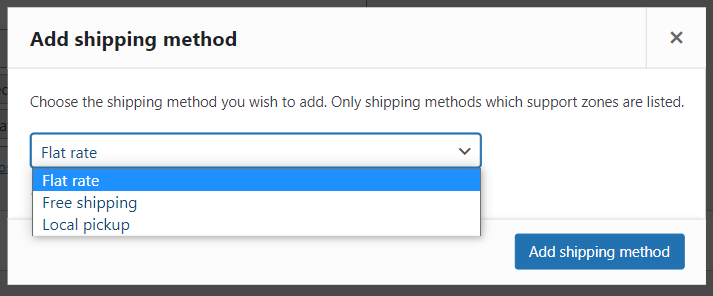
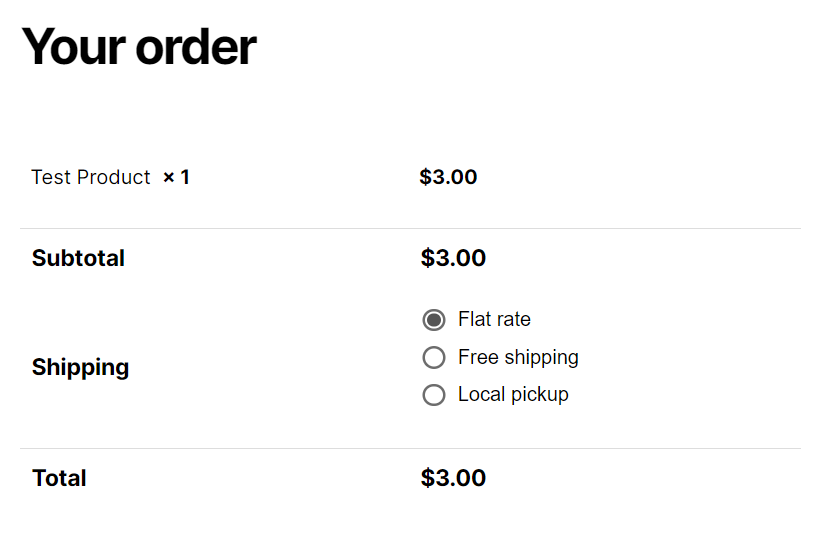
On the next page, you’ll see the default WooCommerce shipping methods:
- Flat rate: This method lets you charge a fixed rate for shipping.
- Free shipping: It’s a special offer that allows customers to receive their orders at zero shipping cost. It can be triggered in many ways which include coupons and minimum cart totals.
- Local pickup: If you have a physical store, you can allow customers to pick up orders themselves. By default, when using local pickup store base taxes will apply regardless of customer address.
When you’re done, click Add shipping method.
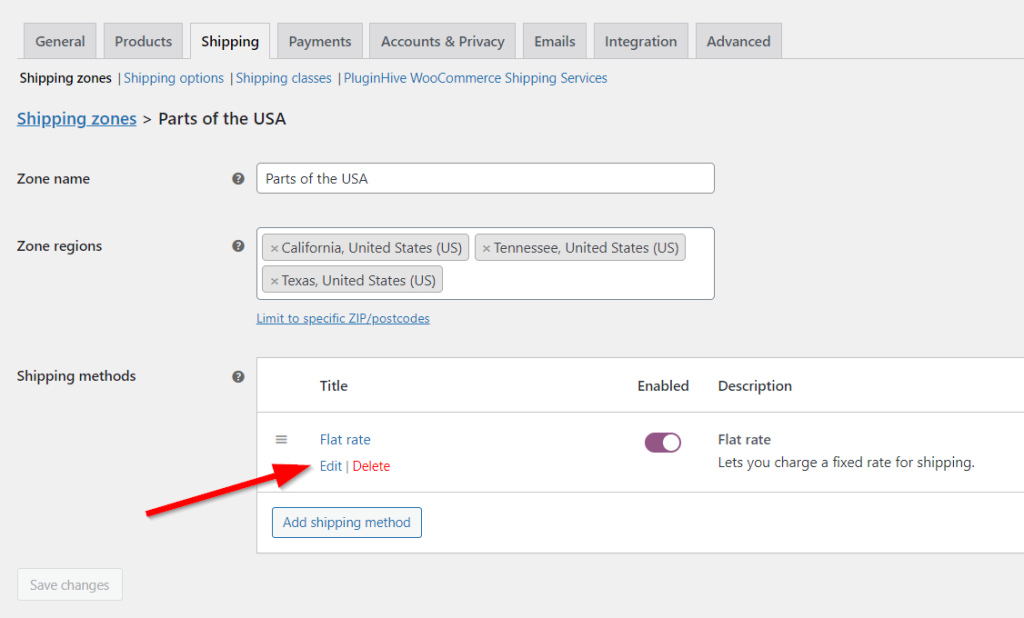
The next step is to configure the shipping method you’ve just created. For example, if you select ‘Flat rate’, you need to assign a fixed rate in your store’s unit currency and also add a tax if it applies. To do this, hover over the shipping method and click Edit.
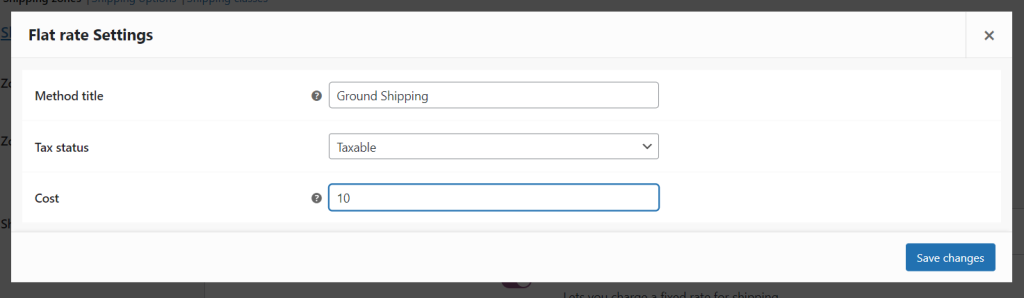
Start by renaming the flat rate shipping method to something like ‘Ground Shipping’ or ‘Standard shipping.’ Next, enter the appropriate tax value and shipping cost. Then click Save changes.
You can add as many shipping methods to a store as possible. This is a good way to offer your customers flexibility in terms of shipping. All you need to do is click Add shipping method again.
If you choose the free shipping option, you’ll be able to add a condition.
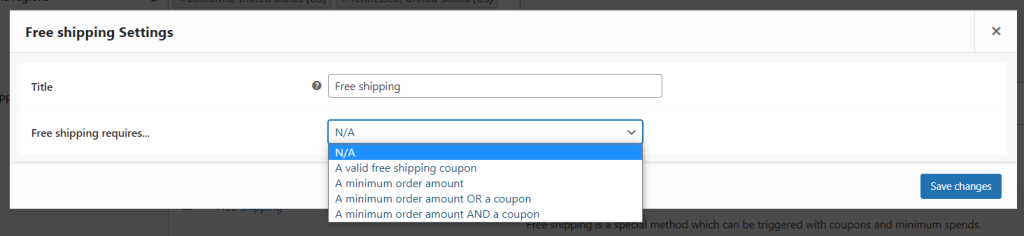
You can change the order in which the shipping methods appear on the checkout page by simply dragging and dropping them.
The topmost option will be the default shipping method WooCommerce selects.
Follow the same process to add as many shipping zones as you want. The order in which you arrange your shipping zones also matters. If two or more shipping zones cover the same location, WooCommerce will apply the shipping methods in the topmost shipping zone first.
What Is the Relationship Between Shipping Zones and Shipping Methods?
If you’re completely new to WooCommerce shipping, you might be confusing shipping zones and shipping methods. Understanding the relationship between these two is vital for providing customized and efficient shipping options to your customers and optimizing their shipping experience.
As you can see in the previous section of this article, shipping zones categorize your store visitors based on their location. On the other hand, shipping methods are the available options that customers can choose from during the checkout process. These include various delivery services, such as standard shipping, expedited shipping, or carrier-specific services.
The relationship between shipping zones and shipping methods lies in the configuration you set in your back end. In essence, when setting up WooCommerce shipping zones, you need to attach shipping methods to them. WooCommerce then offers these shipping methods to customers based on the predefined ‘location clusters’. Shipping zones determine which shipping methods are accessible to customers based on their geographical location.
Remember, we spoke about setting up shipping zones by drawing them and charging for shipping based on these zones. Let’s show you how to set this up the easy way.
How to Display Shipping Costs by Region (Shipping Zone)
The easiest way to display shipping costs by a region is to use a WooCommerce plugin. A region can be thought of the same way as a Shipping Zone since it’s essentially a geographical area where you offer shipping. In this tutorial, we’ll show you how to do this with our location picker plugin, Kikote. The plugin enhances the default WooCommerce shipping zones feature allowing you to:
- Create Shipping Zones by drawing them on a Google Map.
- Display a live map showing all your store’s shipping zones on the checkout page
- Add and display a specific shipping cost for each shipping zone
- Prevent customers from being able to check out if they do not fall within any shipping zone
- Or show only store pickup options when customers are outside your shipping zones
To get started, get your copy of Location Picker at Checkout. Then add it to your store by going to Plugins > Add New > Upload Plugin. Install and activate it.
Next, go to WooCommerce > Settings > Location Picker at Checkout > Shipping.
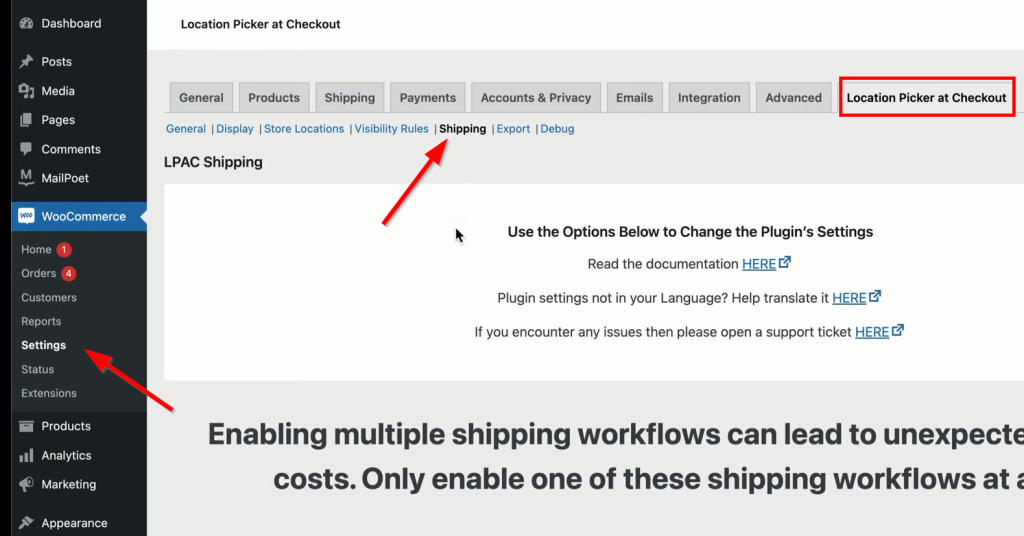
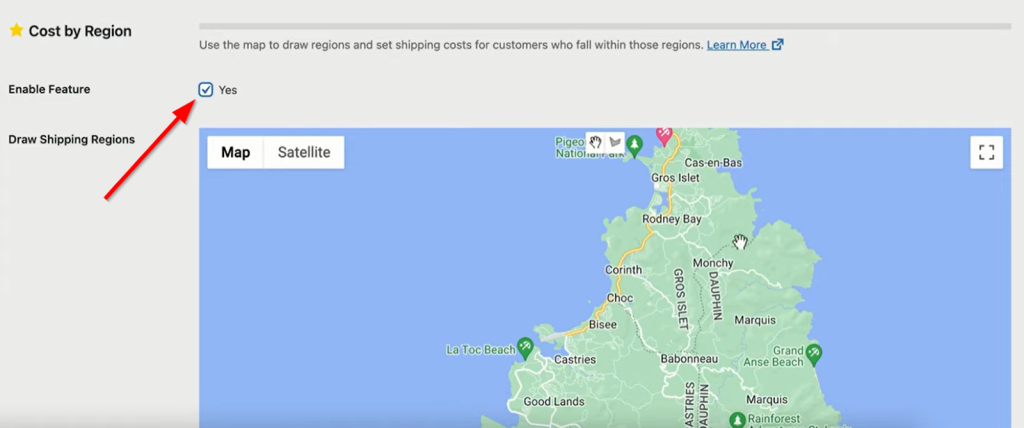
Enable the Cost by Region feature by checking Yes beneath it. Now, a Google map will appear.
Next, use the draw icon to define your first regions using straight lines on the map. Immediately after closing up the boundaries of the region, you’ll get a prompt asking you to name the region and add a cost.
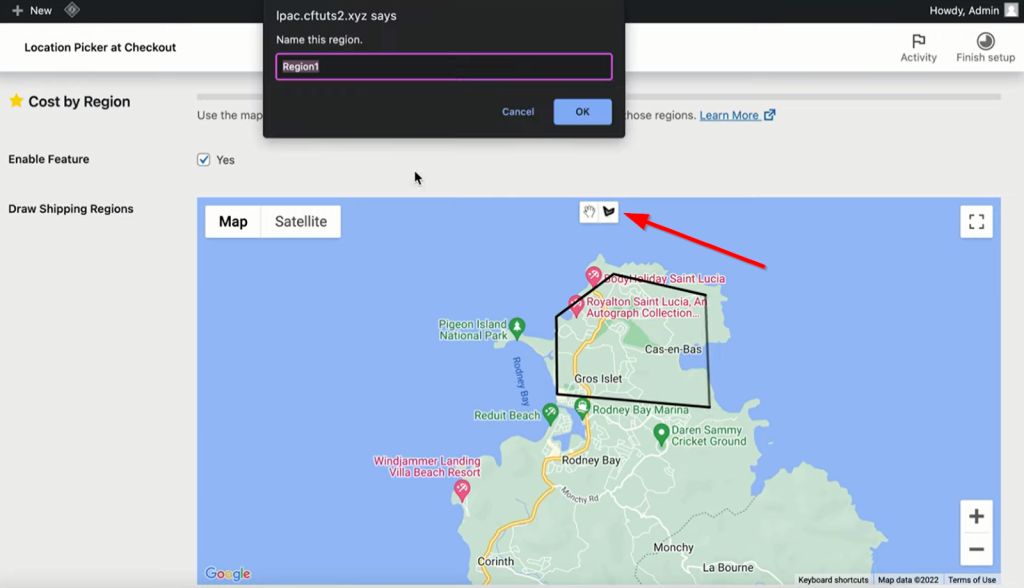
You’ll also be able to set the region’s background color using hex code. You can finetune your region’s boundaries by zooming in and readjusting the lines. Follow this same procedure to create more regions.
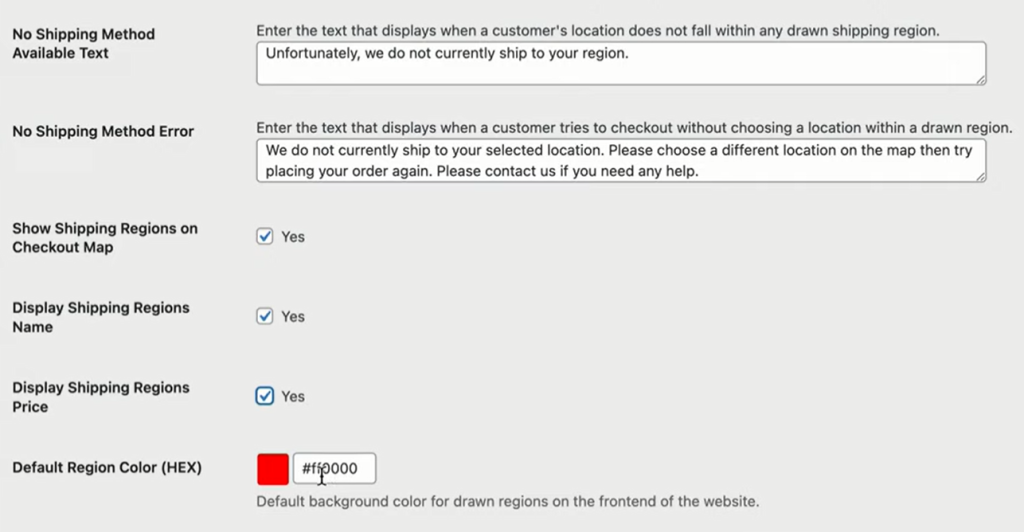
Scroll down to assign shipping methods to your shipping regions. You’ll also be able to set an error message for customers who don’t fall within the available shipping regions.

Another important setting to pay attention to is the option to show the regions on the checkout map on the front end. If you enable this feature, you can also decide whether to show the prices and region names.
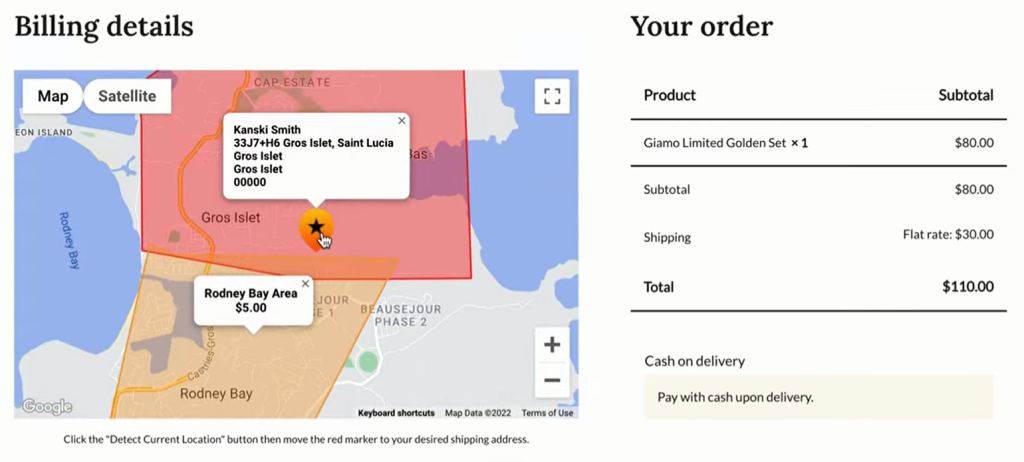
When you’re done, click Save changes and the front-end results should look like this.
Getting Started With WooCommerce Shipping Zones
WooCommerce shipping zones are a critical component of any successful online store’s shipping strategy. You can use them to define geographic regions, set specific shipping methods and rates, and ensure accurate shipping costs and delivery times for customers. This way, you get to provide a seamless and personalized shipping experience, leading to increased customer satisfaction and loyalty.
To further improve the default WooCommerce shipping zone functionality, we highly recommend using our advanced location picker plugin, Kikote. The tool not only allows you to draw custom shipping zones on Google Maps and assign costs to them. You can also use it to display these custom regions elegantly on your store’s checkout page.
This article covers everything from the importance of WooCommerce shipping zones to configuring the most advanced shipping zone features in WooCommerce. We hope this detailed guide has proven helpful. Let us know if you encountered any issues in the comments section below.
Leave a Reply