How to Build a Food Delivery Website With WooCommerce
Want to build a food delivery website with WooCommerce?
If you’re planning to start your own food delivery service, building a website is essential to your business. Creating a site from scratch may seem like a daunting task at first but with the right guidance, you can get your website up and running in no time.
In this article, we will show you the exact steps you need to take to build a food delivery website from the ground up using the WooCommerce plugin.
Let’s get started.
Before we dive into the steps, let’s take a quick look at the cost of building a food delivery website.
How Much Will It Cost to Build a Food Delivery Website?
To build a food delivery website, you will need the following:
- WordPress: An open-source Content Management System (CMS)
- WooCommerce: A free open-source e-Commerce plugin for WordPress.
- WordPress Theme: Acts as a “skin” for WordPress websites.
- WordPress Plugins: Adds new functionality or extends existing functionality on WordPress websites.
- Domain name: The virtual address of your site.
- SSL certificate: A digital certificate to authenticate your site’s identity.
- Hosting server (Website hosting): A storage system to house files and folders of your site.
WordPress and WooCommerce are free software. Themes and plugins are available aplenty. Some of them are free and some are paid. The domain name, SSL certificate, and hosting server are the only paid expenses in this article.
A domain name can usually be purchased for an annual fee of around $12 and website hosting for $60-$80. This means you can get a basic website up and running for around $100.
You will only need to pay for the domain name and the hosting server as most hosting providers offer a free SSL certificate for the first year.
Now that you know the cost of building a WooCommerce food delivery site, let’s start to build one.
How to Build a Food Delivery Website With WooCommerce
You can get a food delivery website up and running by following the steps below:
Step 1: Buy a domain name, website hosting & SSL certificate
Step 2: Install and configure WordPress
Step 3: Adding themes and plugins
Step 4: Convert WordPress site into an e-Commerce site
Step 5: Add food items as WooCommerce products
Step 6: Create a menu on the frontend
Step 7: Add Google Maps to checkout pages
Step 8: Set up delivery scheduling
Step 9: Set up automatic order printing
That’s a lot of steps but don’t worry, we will guide you every step of the way. Let’s begin.
Step 1: Buy a Domain Name, Hosting Server & SSL Certificate
Let’s try to understand what domain names, website hosting and SSL certificates are and why you need them.
Domain Name
A domain name is the name of a website (e.g. facebook.com) and it appears in the address bar of your browser.
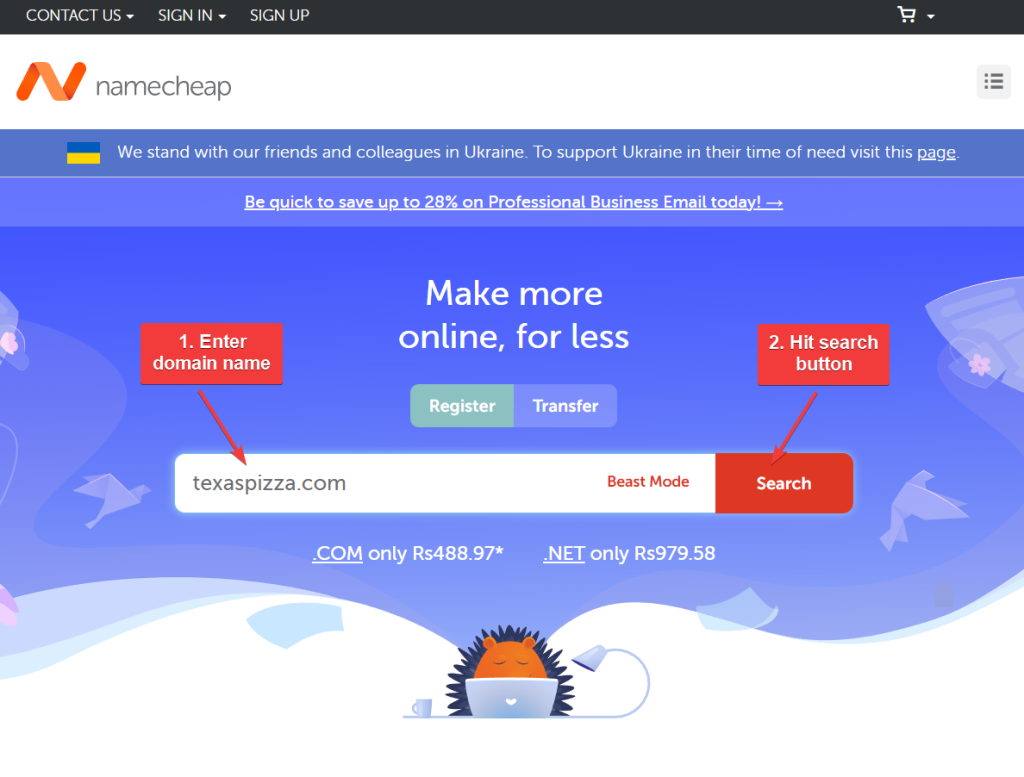
It’s a good idea to choose a domain name that is the same as your food business. For instance, let’s say your food delivery business was called Texas Pizza, then your domain name can be “texaspizza.com.”
We recommend reading this guide on how to choose a domain name for your business.
Web Hosting
Hosting or “Web Hosting” is storage space where your website files will exist, allowing them to be accessible by the people on the internet.
All websites are made of files and folders. These files and folders need storage space. Hosting companies provide these storage spaces for a fee.
There are several hosting companies with different kinds of hosting plans. You can choose any one of the top hosting companies but it’s usually fine to choose the cheapest shared hosting plan for a new website. You can always upgrade later.
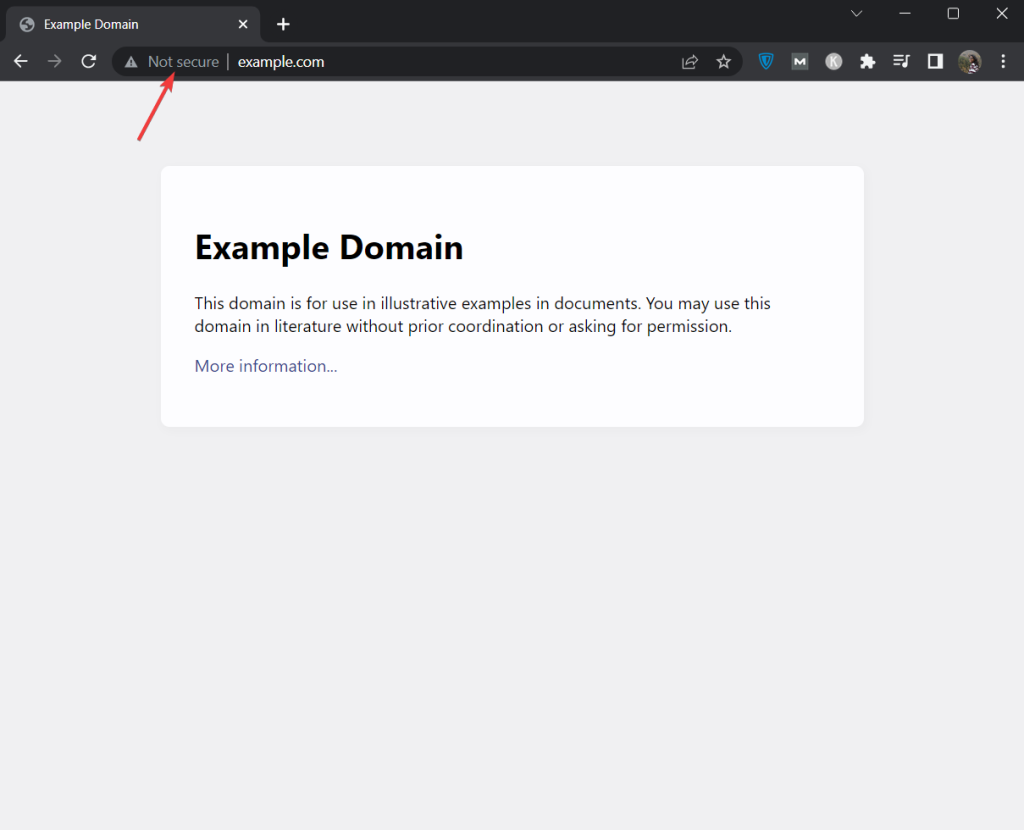
SSL Certificate
The SSL certificate software authenticates the identity of a website. In simpler terms, it tells your visitors that your business is legitimate and your site is safe to browse.
SSL certificate has been made mandatory by all major browsers. Websites without an SSL certificate are tagged as “insecure” by the browser.
There are different types of SSL certificates and this guide will help you figure out which SSL certificate your food delivery website needs.
How to Buy a Domain Name, Hosting Server & SSL Certificate
You can buy a domain name, hosting space as well an SSL certificate from a hosting provider. There are separate vendors selling only domain names or only SSL certificates but purchasing them all from one place is efficient.
Just open the website of the hosting company of your choice, then enter your domain name, select the cheapest hosting plan, add an SSL certificate to the cart, and make the purchase.
If you need assistance with making the purchase, look at the help docs of the hosting provider or reach out to their support team.
Step 2: Install & Configure WordPress
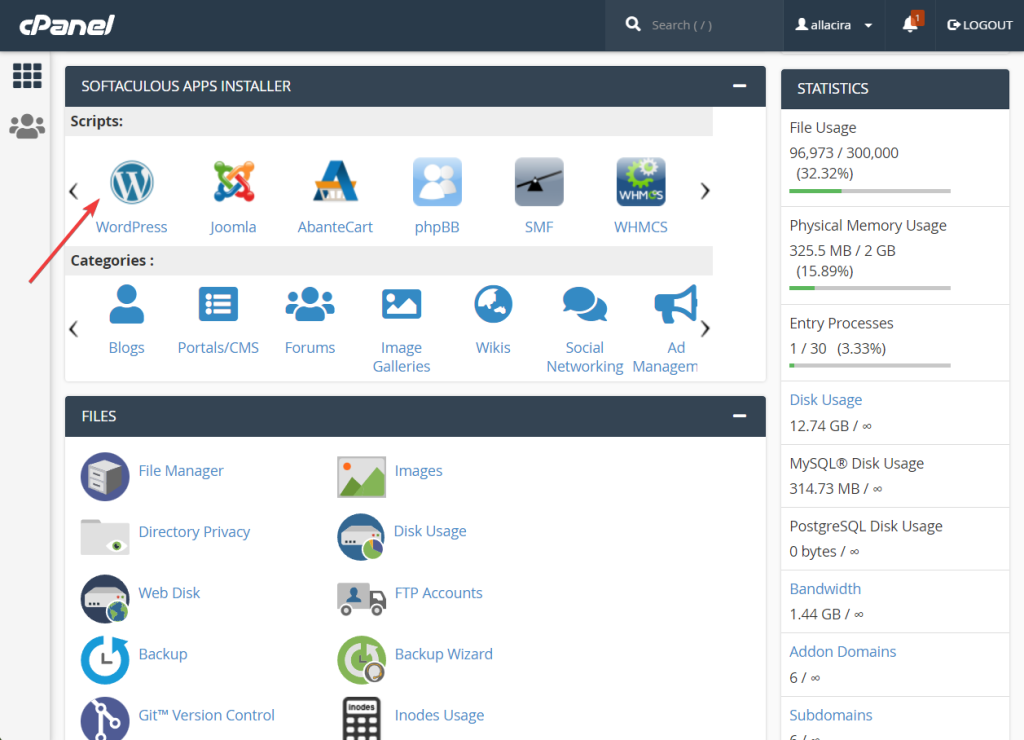
Most hosting companies offer a cPanel or an in-house cPanel-type software like Hostinger’s hPanel. You can install WordPress using the cPanel.
Locate the cPanel inside your hosting account and go to Softaculous Apps Installer > WordPress.
On the next page, there is a section called Software Setup. Go to that section and choose https:// as protocol and your domain name from the dropdown menus.
Hit the Quick Install button and WordPress will be installed within a few seconds.
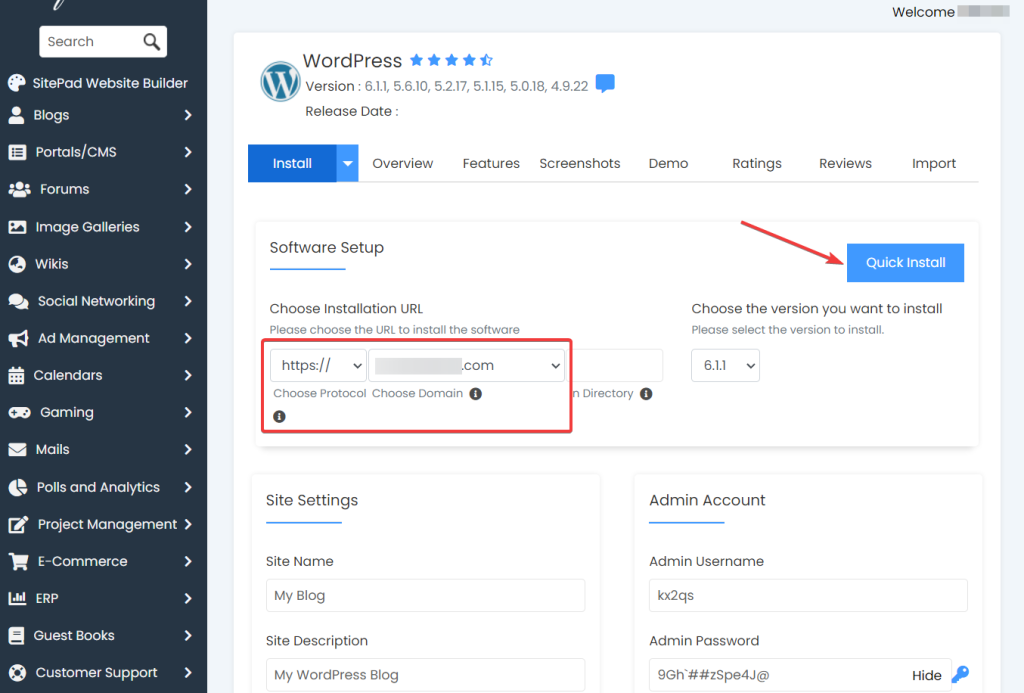
After the installation is over, Softaculous will give you a login URL along with a username and password. Use them to login into your website and be sure to remember them so you can log in at a later time.
Next, configure the WordPress settings using this official WordPress help doc and proceed with step 3.
Step 3: Adding Themes & Plugins
Themes and plugins are pieces of software that you can install on your WordPress website.
Themes dictate the overall appearance of your website and plugins help add new functionality or extend existing functionalities of your WordPress website.
Install Themes
You don’t need to install more than one theme to design your WordPress site. A good place to start will be to visualize the design you want and look for similar designs in the themes listed on the WordPress repository.
All themes in the WordPress repository are free or freemium products so don’t worry about needing to pay for one. There are many free options available.
If you can’t decide on a theme then you can do a quick Google search to see the most popular e-Commerce ones available at the time of reading this article.
Below we will be downloading a theme from the WordPress repository.
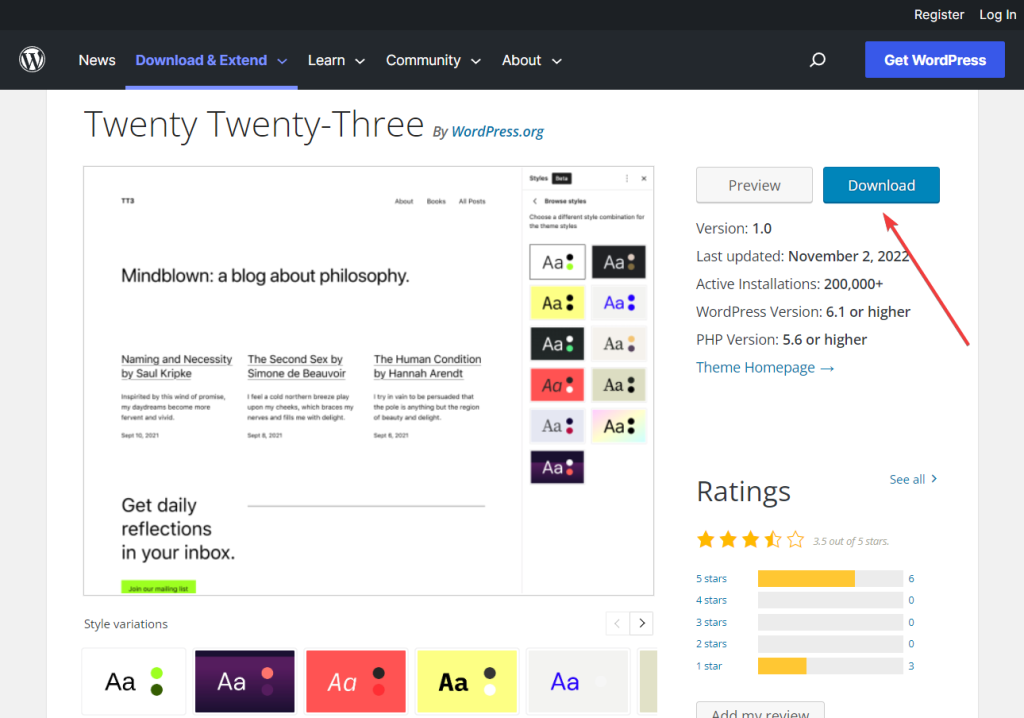
Make sure you log into your website and go to Appearance > Themes > Add Now > Upload Theme.
Upload the theme by clicking on the Choose File option and then hit the Install Now button.
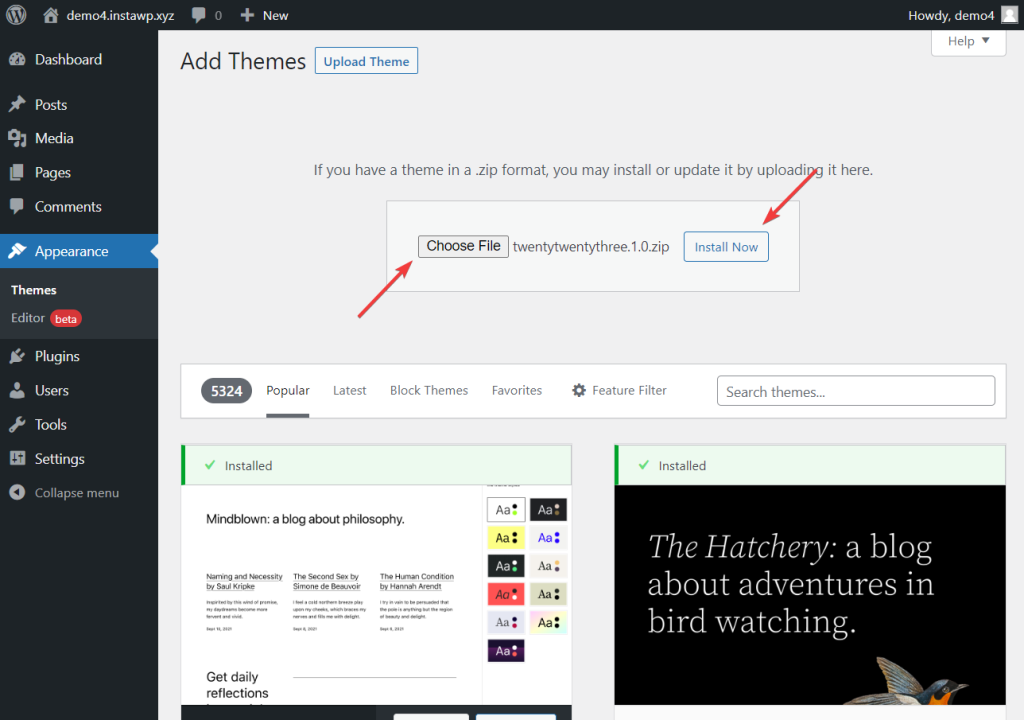
After the installation is complete, you should see an Activate button on your screen. Select that to activate the theme on your site.
And that’s it. You have now installed a theme on your WordPress site.
Install Plugins
Unlike themes, you can install as many plugins as you like on your WordPress website to add the functionality needed. As for which plugins to add to your site, you need to decide that for yourself but try not to overdo it by installing unnecessary plugins.
The need for plugins would differ from site to site. A marketing blog may require email opt-in plugins to allow visitors to sign up for their newsletters, but a photography site would need gallery plugins for showcasing the photographer’s work.
First figure out what plugins you need, download them from the WordPress repository, and install them into your WordPress site.
For now, let’s install the WooCommerce plugin which will help convert your website into an e-Commerce site. More on that in the next section.
Step 4: Convert WordPress Site Into an E-Commerce Site
To convert your WordPress site into an e-Commerce site, you need a plugin called WooCommerce. In this section, you will learn how to install WooCommerce plugin into your WordPress site.
Download the plugin to your local computer. Open your WordPress dashboard and go to Plugins > Add New > Upload Plugins.
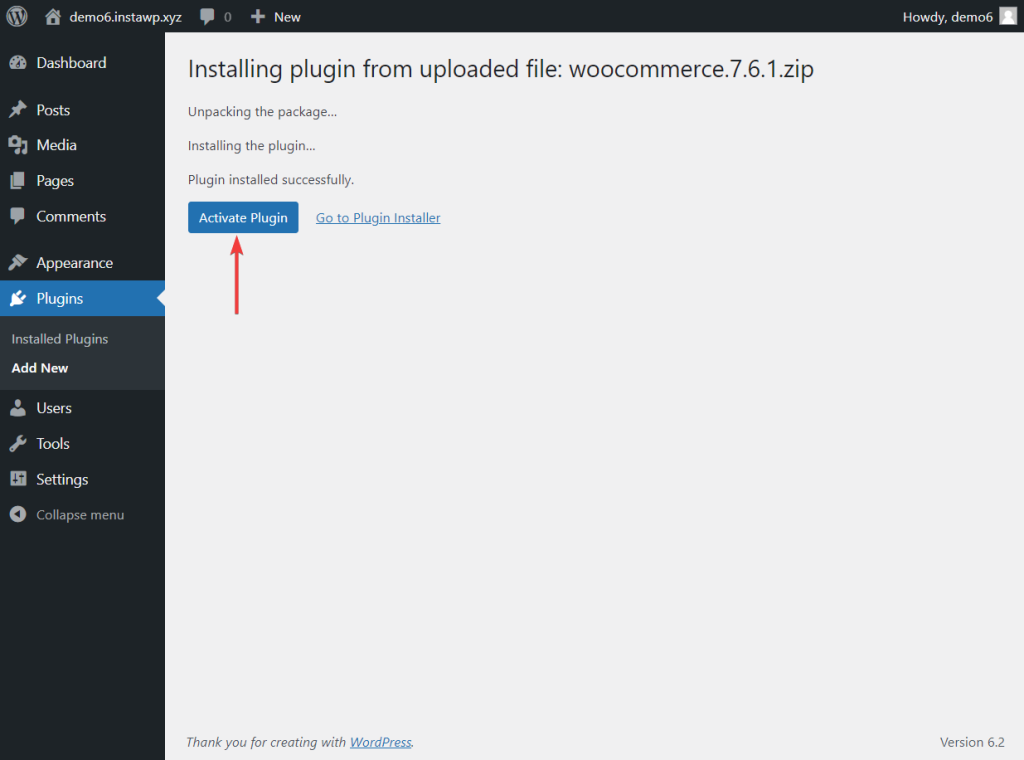
Upload the plugin by using the Choose File option and hit the Install Now button.
After the installation is complete, an Active button will appear on the screen. Choose that and the plugin will be activated on your WordPress website.
Once the plugin has been activated on your site, you can access the plugin’s settings pages from your dashboard menu located on the left side of the screen.
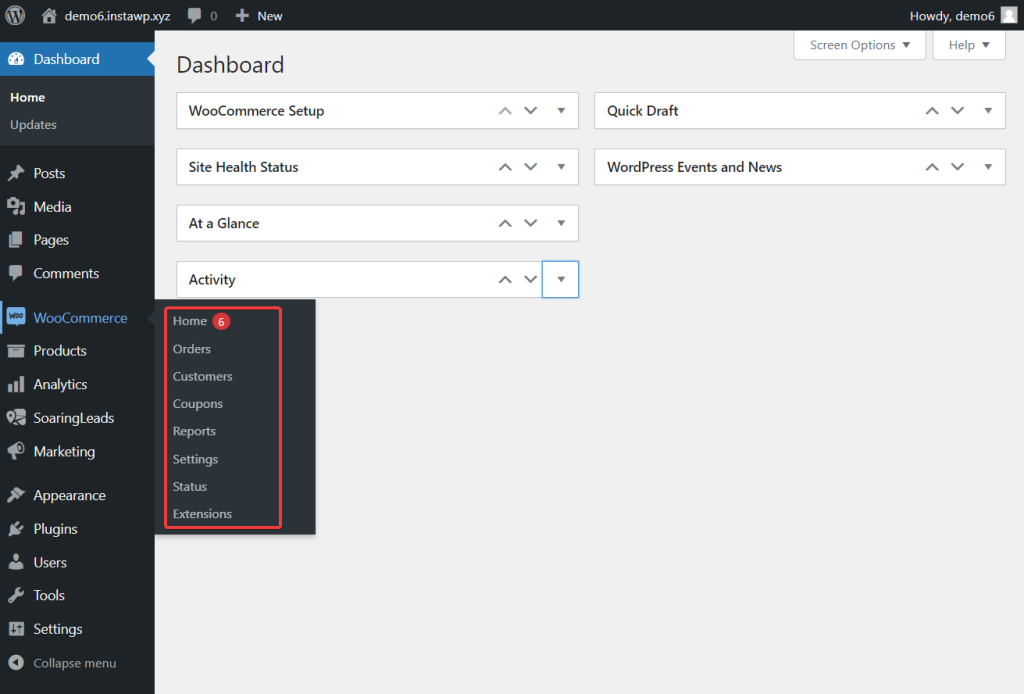
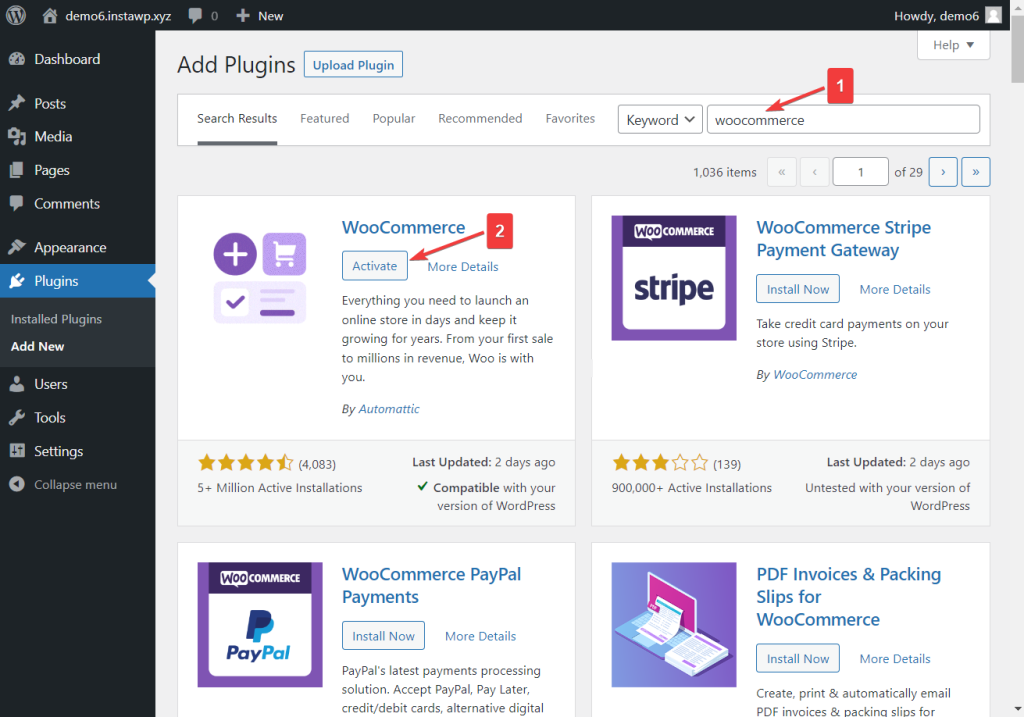
An alternate way of installation is by going to Plugins > Add New and inserting the name of the plugin in the search box. When the plugin appears, hit the Install and then the Activate button.
Configuring the plugin is a long process and it has already been thoroughly covered by the WooCommerce team. So we recommend following their dedicated guides on setting up the WooCommerce plugin properly.
And before you proceed with the next step, be sure to set up your site’s shipping and payment options.
Step 5: Add Food Items as WooCommerce Products
To add food items as products, you need to have the descriptions, images, and prices for the food items ready.
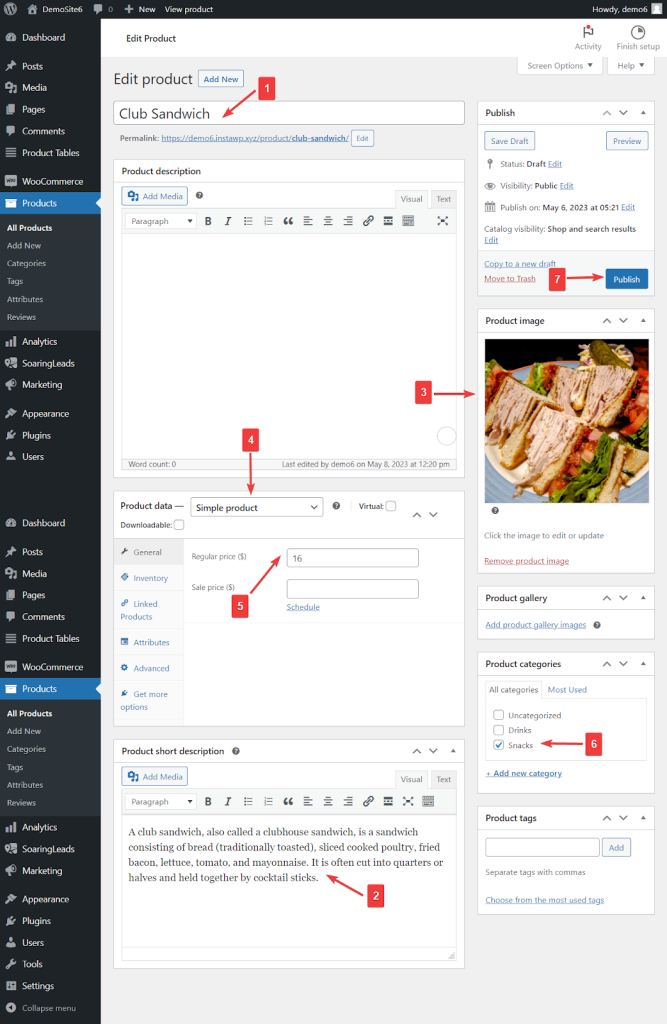
Then open your WordPress dashboard and go to Products > Add New and proceed to add a title, description, and image of the food as shown in the image below.

Go to the Product data and choose the simple product option from the dropdown menu.
Please note that if you want to offer a choice of options for your food items, instead of the simple product, choose “Variable Product” from the dropdown.
Next, in the General section, add the price of the food item. And be sure to add prices for each variation if you’re using the variable product option.
Also, add a category before hitting the publish button.
This is the basic setup you need for all your food item pages. If you are curious about the various setting options on the product page, then take a look at this official WooCommerce guide.
Step 6: Create a Menu on the Frontend
After adding all the food items, you need to display them on your website in the form of a menu. This can be done using the free WooCommerce Product Table Lite plugin.
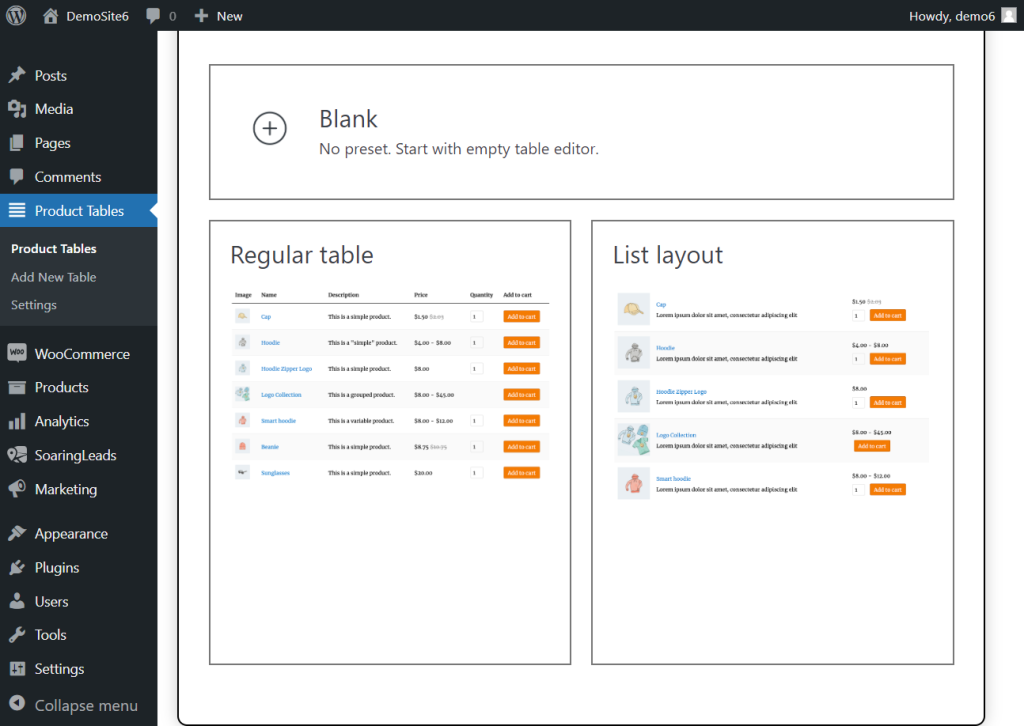
Install the plugin and then log into your website. The plugin will add a Product Table option on your site’s left-hand menu. Then, go to Product Tables > Add New Tables.
You have the option to create a table from scratch or select one of the ready-made tables. We recommend going with one of the ready-made tables.
On the next page, you need to take the following steps:
- Rename the table
- Go to the Query option and select the categories of food you want to show on the menu
- Hit the Save Settings button
- Copy the shortcode that appears below the table name
The menu is ready. You now need to create a page and publish the menu on that page. Go to the site’s left-hand menu and navigate to Pages > Add New.
Add “Food Menu” as the title to the page, paste the shortcode, and proceed to hit the Publish button.
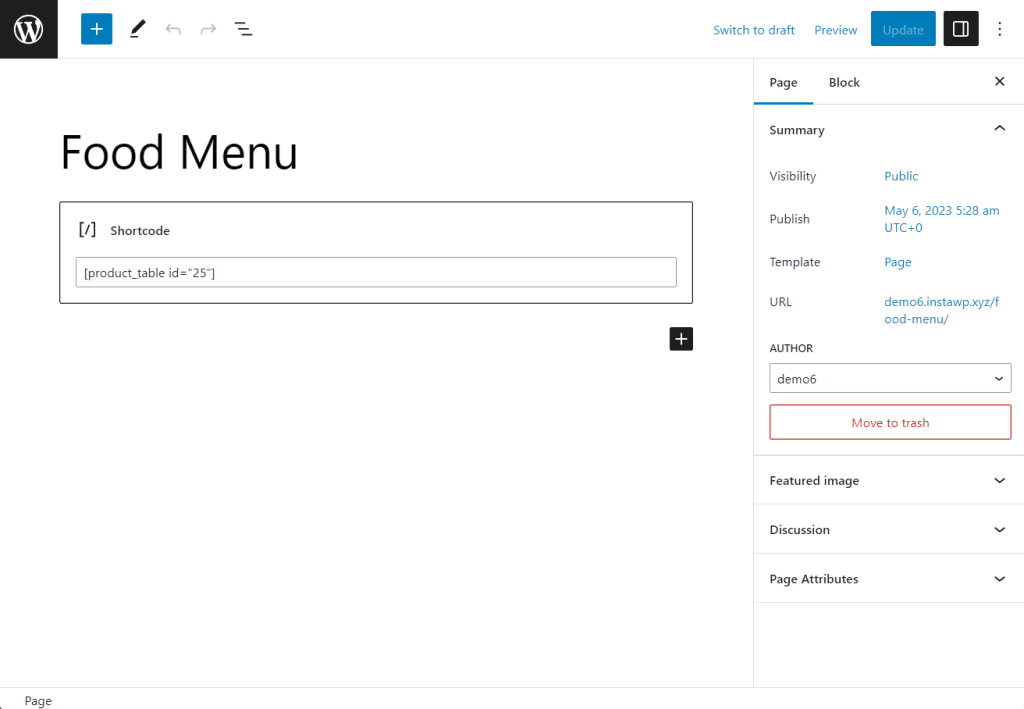
Open the new Food Menu page on the browser and you should see a menu like the one in the picture below.
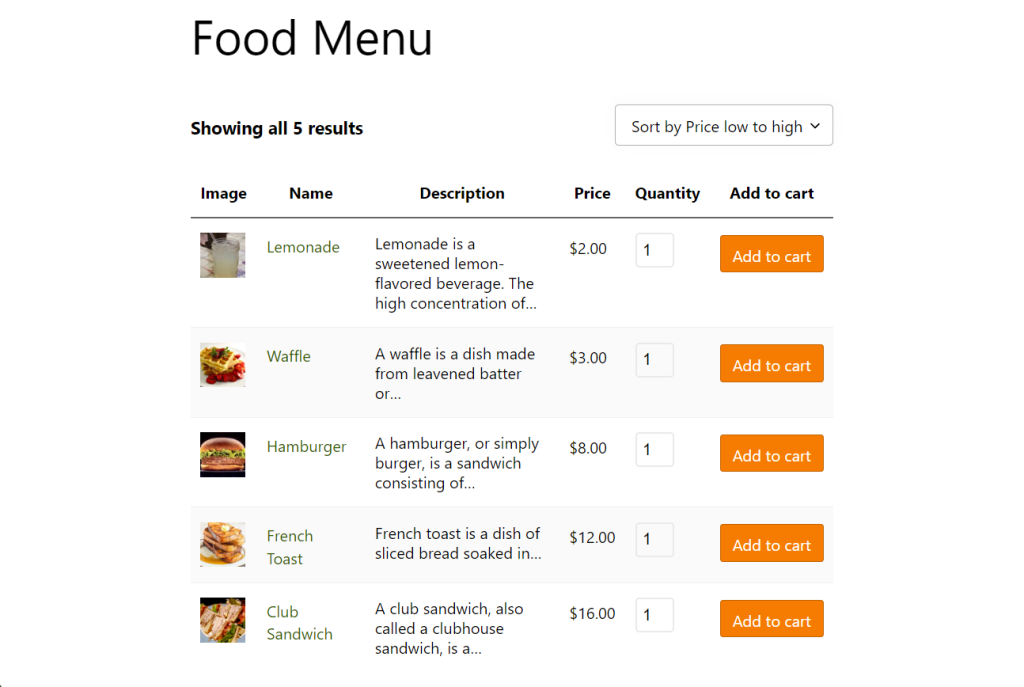
Want to add or remove any element from the menu? Do that from the Columns option of the WooCommerce Product Table. If you need assistance in making modifications, then check out these help documents.
Step 7: Add Google Maps to Checkout Pages
When visitors select a food item from your menu, they will be taken to the cart page to review the order.
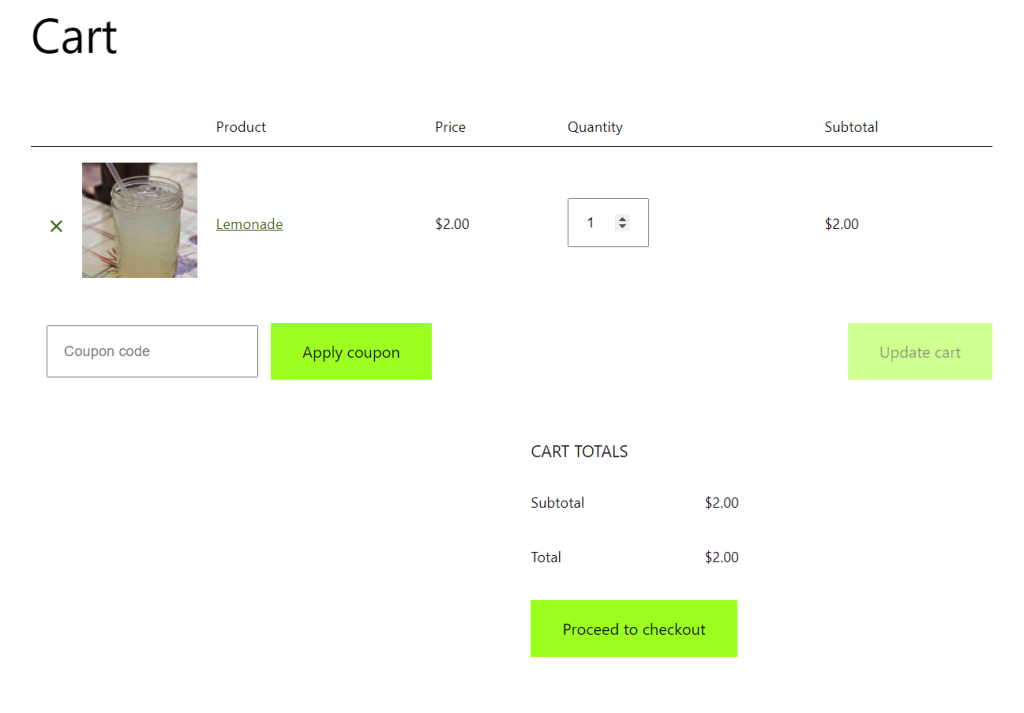
Next, visitors will proceed to the checkout page where they can add their delivery address.
Anyone who has run a delivery and pickup business will tell you how the addresses provided by customers are not always sufficient to make fast deliveries.
A hallmark of a good food delivery business is to deliver food items on time. This is made possible by efficient delivery men and accurate delivery addresses. Inaccurate delivery addresses cause delays and delays in deliveries will sound a knell to your business sooner or later.
To prevent your business from collapsing before it has a chance to take off, you should use our Kikote Location Picker plugin. Here’s what it does:
- Adds a Google map to your checkout page
- Allows customers to select their exact location from the Google map
- Automatically picks the exact location and allows customers to make corrections
- Autofills checkout page address fields after the customer picks a location from the map
- Displays different shipping regions on the google map
- Allows customers to see the cost of shipping to different regions
- Enables customers to save multiple different addresses
- Allows website owner to set shipping cost by region, distance, or store
- Enables website owners to determine popular order locations
- Allows website owners to set map visibility rules
- Create custom maps and add them to any page on your site, among other things
You can learn about all the features that Kikote provides here.
Please note that the plugin has a free and a premium version. And many of the features listed above are available only in the premium version. But, don’t worry, the free version should be sufficient for a new food delivery website. That said, if you require any of the advanced features, you can certainly upgrade to the premium version.
In the next section, we will use the free version to demonstrate how easy it is to set the plugin up.
Set Up Kikote Location Picker Plugin
Download the Kikote plugin from here and install it into your website using the methods we showed you back in step 3.
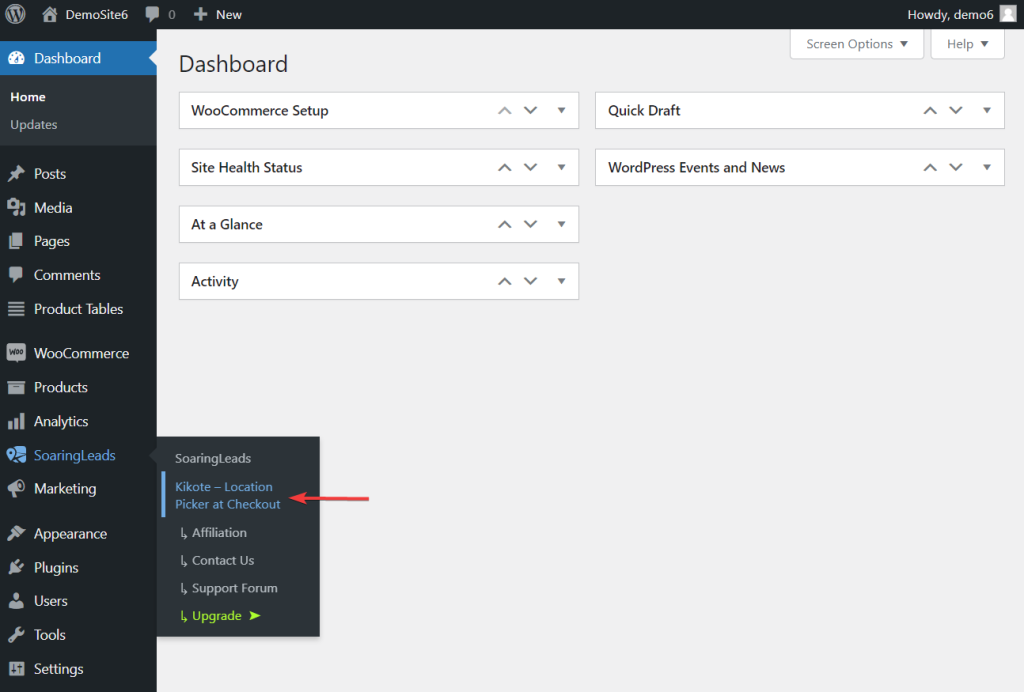
After installation, you should see a SoaringLeads option appear on the left-hand menu of your site. Go over to that option and select Kikote.
You will be taken to the Kikote setup page where you will be asked to create a Google Maps API Key and add it to your site.
Next, from the dropdown beside the Map Region option, select the country where you have set up the delivery business.
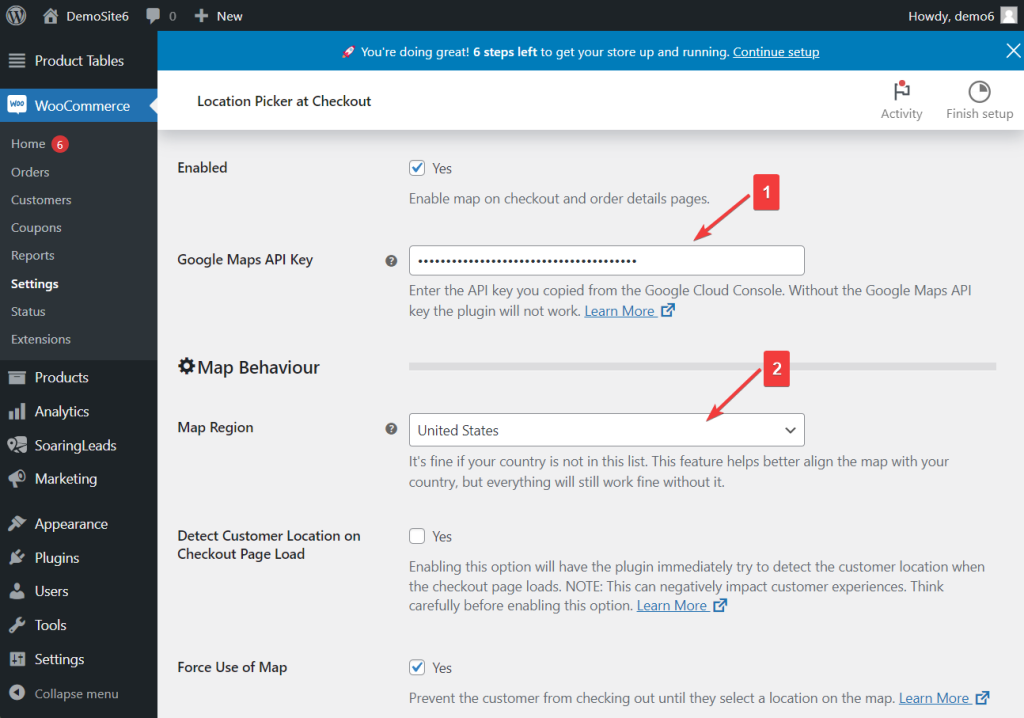
Save your settings, open a checkout page, and you should be able to see a Google map appearing on the top of the page.
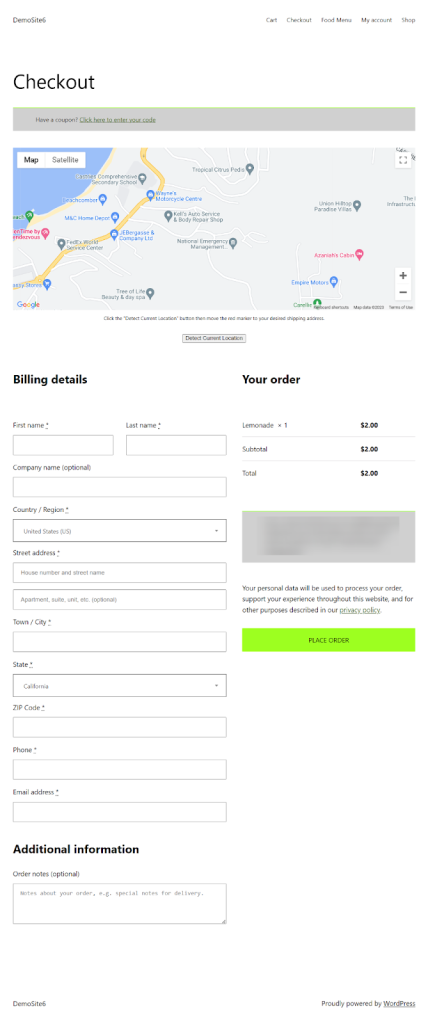
And that’s it, folks. You have now added a map to your food delivery website using the Kikote plugin.
We strongly recommended that you go through all the options on the setup page and enable or disable the options according to your needs. Most options are pretty self-explanatory. But if you require assistance, use these help docs.
Step 8: Set Up a Delivery Scheduling
Knowing when the customer wants the food delivered is an important part of running a food delivery business. Most customers these days want instant services. Some customers will, however, want to schedule deliveries at a later date and time.
Scheduling deliveries can be made possible through a food delivery plugin called Delivery & Pickup Scheduling.
Download the WooCommerce delivery scheduling plugin from here and install it on your website.
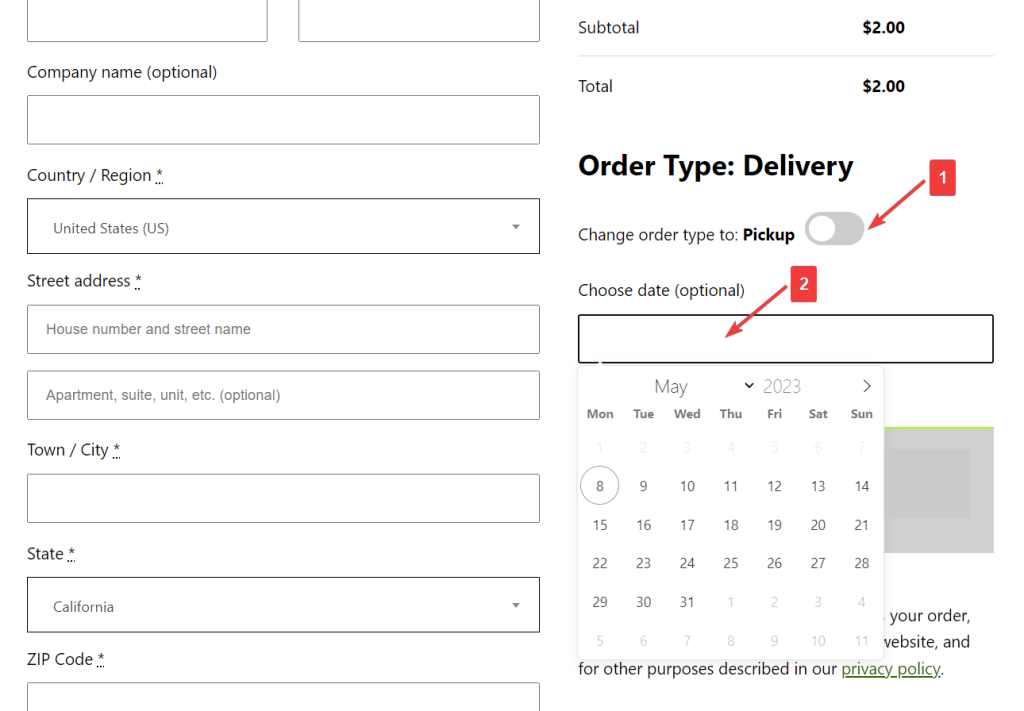
Open a checkout page on your site and you should be able to see a new section called the Order Type on the right side of the screen.
There are two options in this section. The first option allows customers to set order types, i.e. delivery or pickup. The second one enables customers to choose a date and/or time for delivery.
Before moving on to the next step, you need to set the plugin up according to your own needs. The setting page can be accessed by going to SoaringLeads > Delivery & Pickup Scheduling.
On the setting page, you can make a ton of modifications. For instance, you can change the display location of the Order Types section, set your timezone, include or exclude delivery days, make the date and/or time field mandatory, and set minimum and maximum days in the future that customers will be able to schedule an order for, among other things.
Delivery & Pickup Scheduling is a perfect delivery plugin for WooCommerce restaurants and comes with a free as well as a premium version. The premium versions offer more features like restricting the number of orders by day or time slot, hiding the date and order type section to customers with certain user roles, etc.
Step 9: Set Up Automatic Order Printing
To run an efficient food delivery service, you need to employ efficient employees and create an efficient system. Discussing how to hire efficient employees and how to create efficient systems are beyond the scope of this article.
The only recommendation we will make is to add an automatic printing of orders feature to your WooCommerce store.
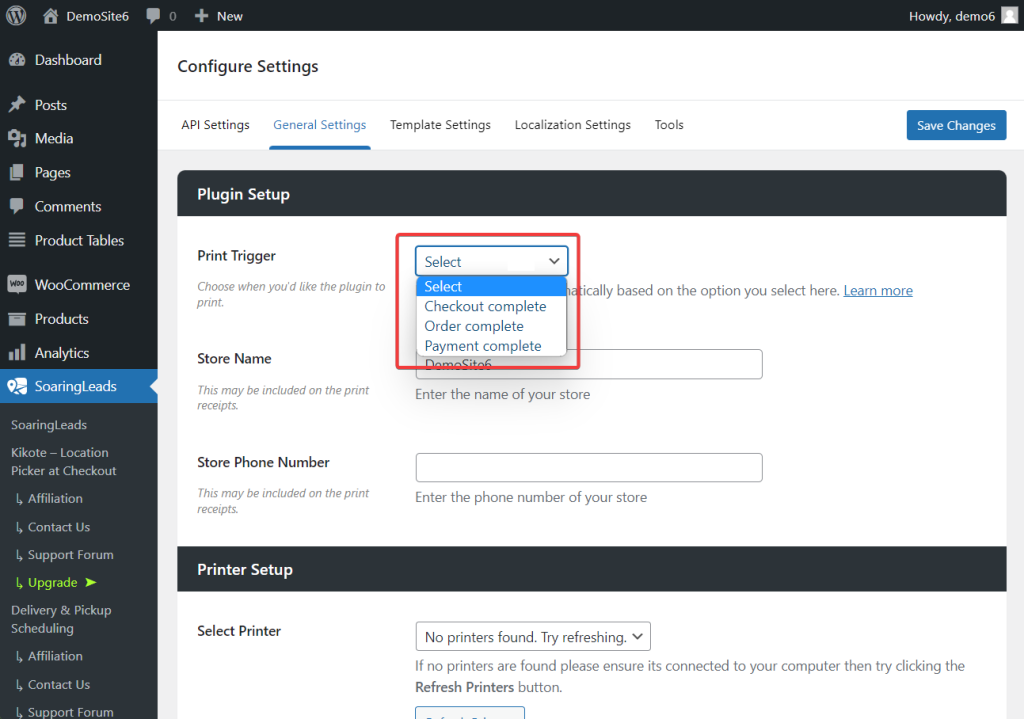
Install Printus into your website. Whenever an order is placed through your site, this cloud printing plugin for WooCommerce will automatically print out the order details for you or your employees as a way to notify of a new customer order.
The plugin allows you to set when the printing will begin, i.e. after the order is placed (whether or not you’ve captured the payment), or after the order payment has been captured and is marked as complete.
One of the most impressive features of this plugin is that it comes with many actions and filters that allow you to alter its logic. In simpler terms, you can add your own print triggers, and create your own custom templates, among other things.
Conclusion
Building a food delivery website is not the most difficult thing to do but it’s certainly a lot of work. It’s easy to get overwhelmed and make mistakes while carrying out the steps listed in this article. We recommend setting aside some time and reading the guide carefully before executing any of the steps.
If you have any questions or get stuck while building the website, let us know in the comment section below.
Leave a Reply