IMPORTANT #
If you are using WooCommerce Checkout Blocks for your checkout page, then you need to switch to the Classic Checkout to use the plugin. You will not see the map show on your checkout page if you do not switch to Classic Checkout. Please see instructions for how to switch to classic checkout here.
Video Tutorial #
Join our E-commerce Support Community. #
Meet store owners like yourself from around the world navigating E-commerce! Share tips, get advice, recommendations and see milestones in your growth. Learn more.
Written Tutorial #
Step 1 #
Log in to the Google Cloud Platform Here >>
If you have no projects the page will look like this:
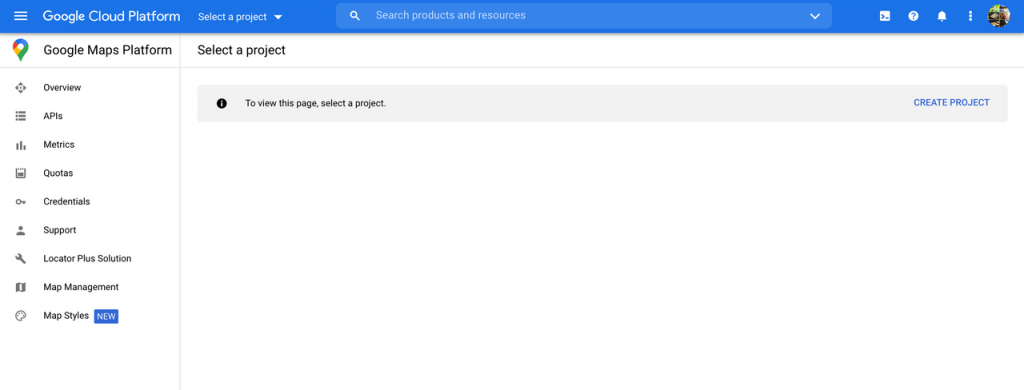
Click the “Create Project” button to create a project.
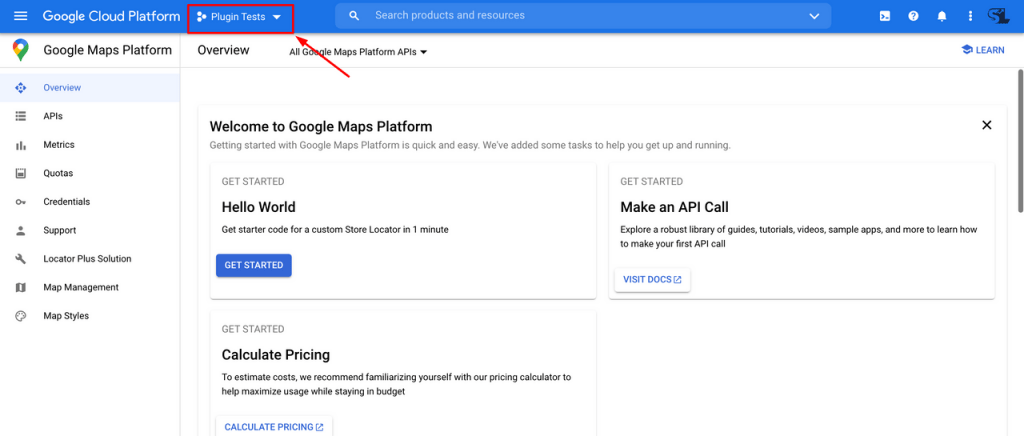
If you already have projects on your google account then you should create a separate one for the plugin by clicking the dropdown on the top left corner and then selecting “New Project”:
Step 2 #
Enter a descriptive project name that will help you identify the project in the future and the click “Create”:
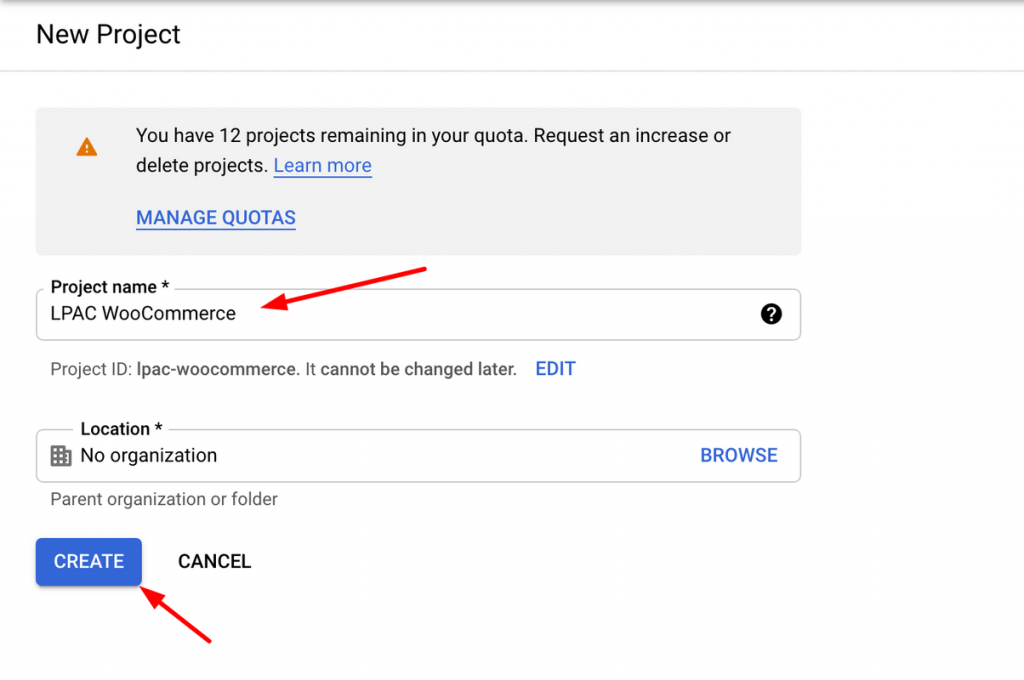
Wait for Google to provision the project then move to Step 3.
Step 3 #
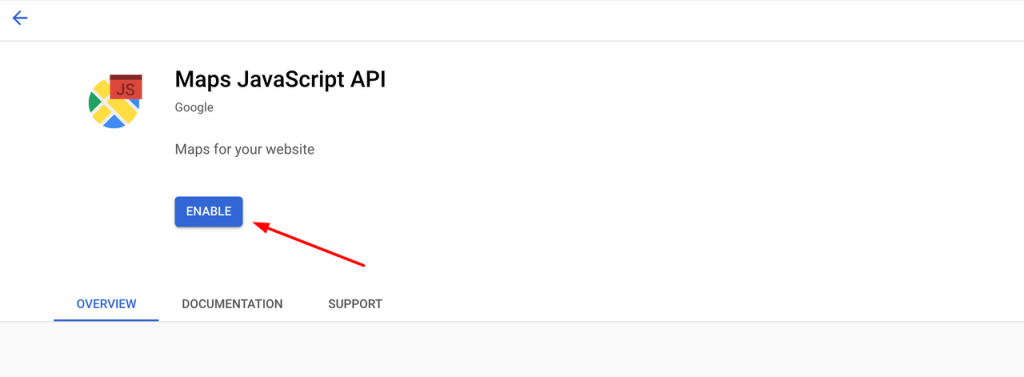
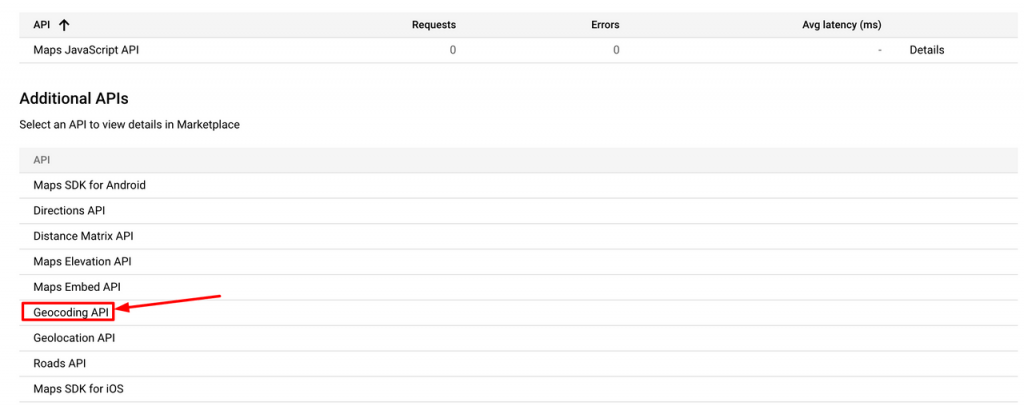
A list of Available API tiles will be presented on the screen.
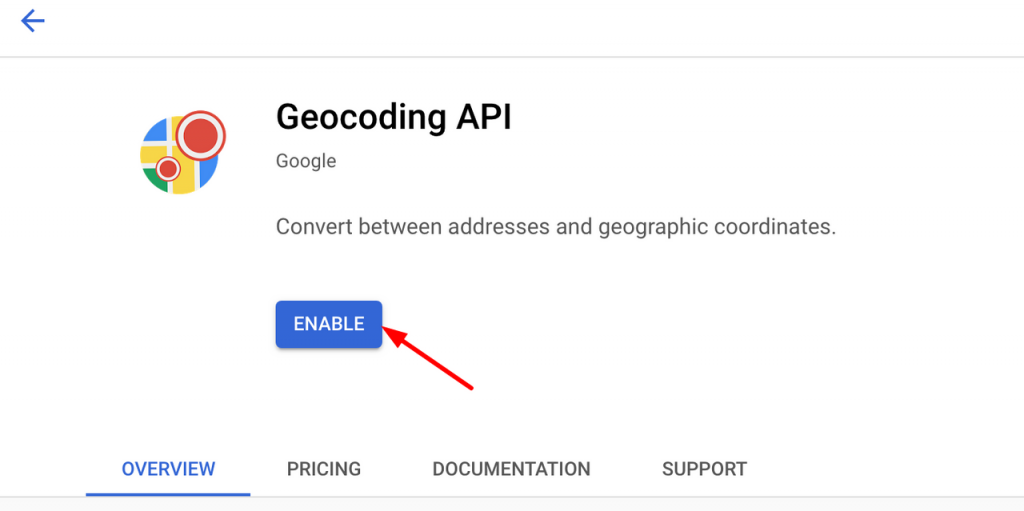
Enable the Maps JavaScript API and Geocoding API by clicking on the tile or searching for it in the search bar. (NOTE: in the second screenshot be sure you’re selecting Geocoding NOT Geolocation):
Step 4 #
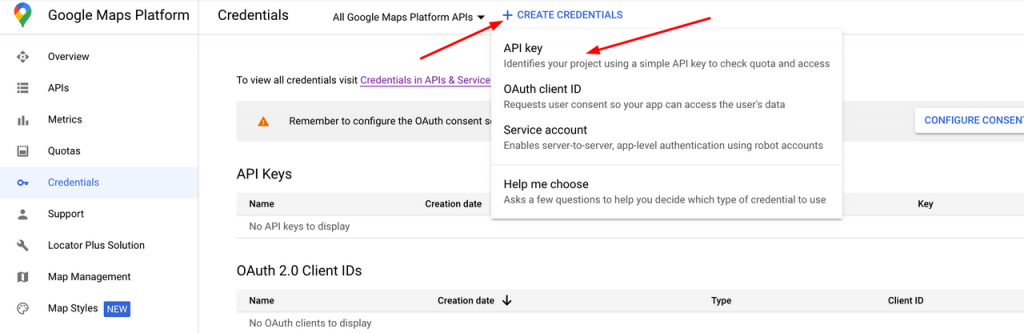
Once both APIs are enabled, click on “Credentials” in the left sidebar -> Create Credentials -> API key:

Step 5 #
Copy the generated Key, paste it Google Maps API Key settings of Kikote, and save your changes.
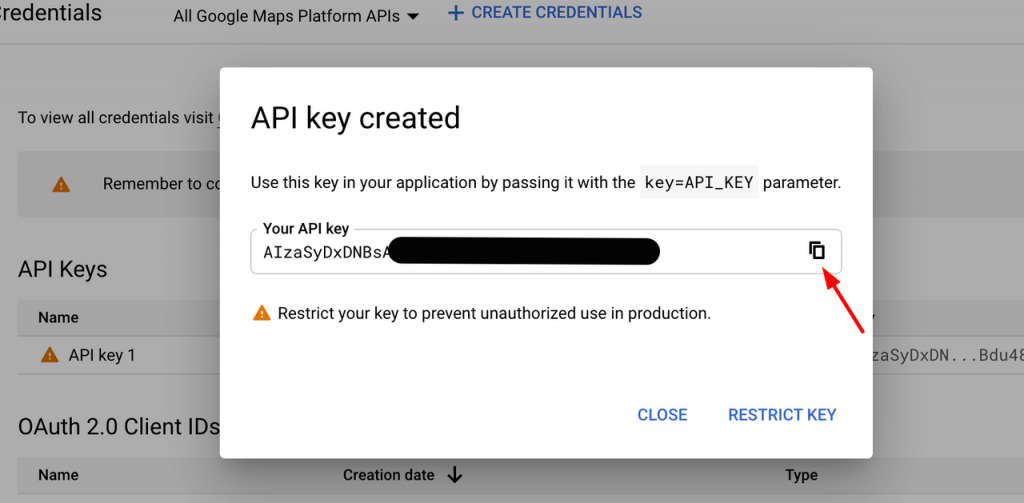
Once you’ve copied the API key paste it into the text box on the plugin’s General Settings page and then save your changes:

IMPORTANT: Restricting Your API Key #
It’s important to restrict your API Key to prevent unauthorized usage of your request Quota. Click on the edit button next to the key then set “Application restrictions” to “HTTP referrers (web sites)” then click “Add An Item”

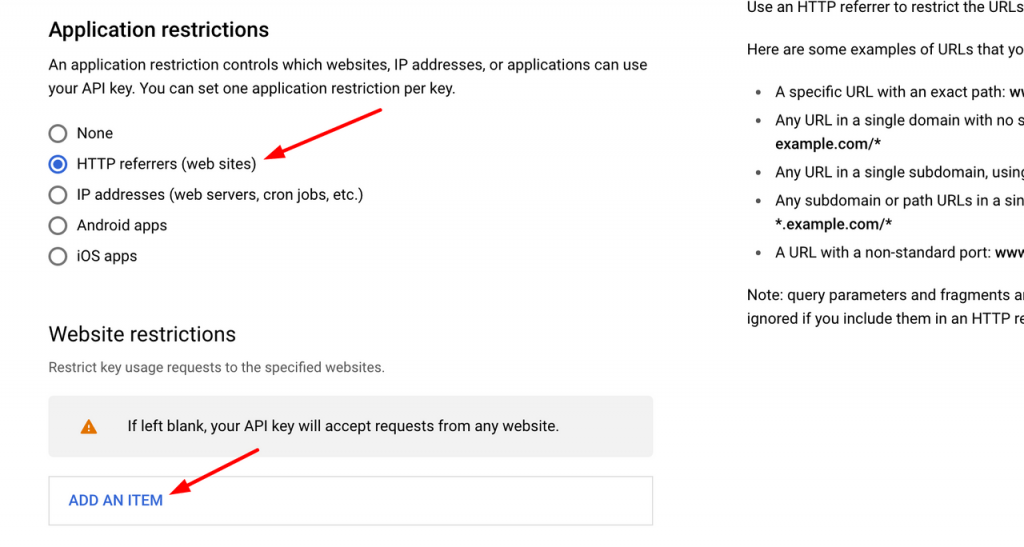
Add the restriction based on your website URL.
Example:
If a website URL is https://tomsdelivery.com then https://tomsdelivery.com/* would be the Referrer.
If the website you install Kikote on is a subdomain with the URL: https://hardware.tomsdelivery.com then the value should be set to *tomsdelivery.com/*
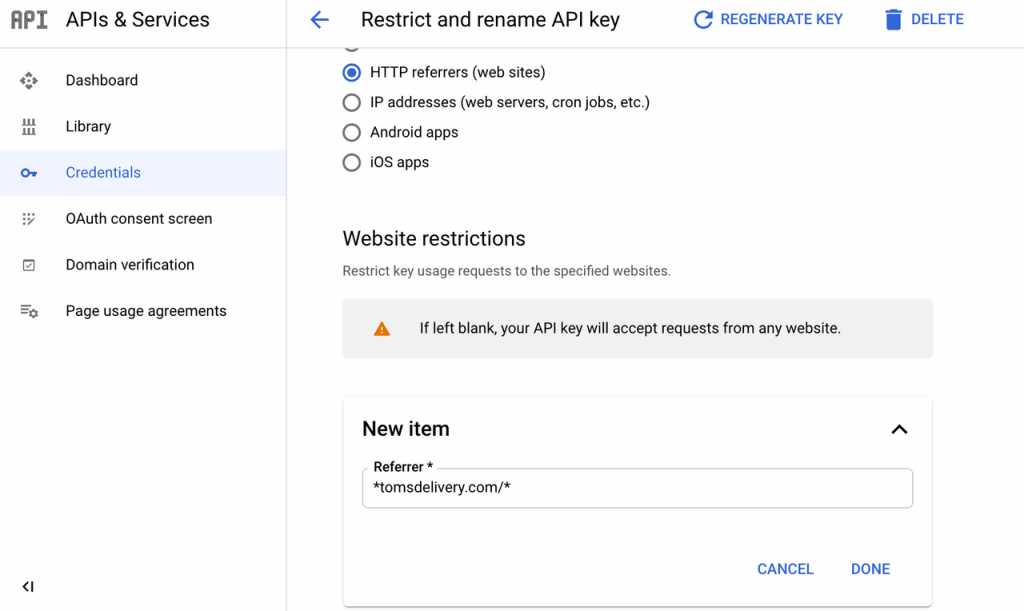
Click “Done” then “Save” to save your changes.
NOTE: Leave the “API restrictions” option set to “Don’t restrict key”
IMPORTANT: Setting up Billing & Google Monthly Credit #
Kikote Makes use of the Google Maps APIs. Namely the Maps JavaScript API and the Geocoding API. To make use the Geocoding API, you will need to set up billing for the account on which you created the project: https://console.cloud.google.com/project/_/billing/enable
Though Google asks you to set up billing, you will not get charged unless your usage of the APIs exceeds $200 in a particular month. As Quoted from Google:
Google Maps Platform offers a free $200 monthly credit for Maps, Routes, and Places (see Billing Account Credits).
With the $200 monthly credit, the vast majority of customers find their use cases are completely free.
You won't be charged until your usage exceeds $200 in a month.
Simply put, if you’re receiving less than ~15,000 pageviews a month on your WooCommerce checkout page, then you have not reached the threshold at which Google will start billing. So you won’t pay a dime.
Read more about Google pricing Here >>
IMPORTANT: Setting Up Budget Alerts #
Budget Alerts can help you stay below your $200 USD monthly allowance. Find out how to create a budget alert for you Kikote project Here >>
Places AutoComplete Feature #
If you plan to use the Places AutoComplete Feature then please see how to set it up here.


