Google provides a free credit balance of $200USD monthly for all Google Cloud Console accounts to use. Location Picker at Checkout for WooCommerce (Kikote) currently makes use of 2 of Google’s APIs, these are the Google JavaScript API and the Geocoding API. The number of APIs in use by the plugin might change overtime but the $200USD monthly credit will be used to cover the charges of all APIs in use.
To prevent your account from going over this $200USD monthly credit, you might want to set billing alerts so that you can disable the plugin’s functionality if you are not willing to make the payment and wait for the next month credit to come around.
Note: If you go over the $200USD monthly credit Google will charge you $200USD + whatever additional fees you’ve accrued.
If you website receives a great amount of traffic to your WooCommerce checkout page (upwards of 14k checkout page loads month) and a lot of map uses, then you might most likely go over this $200USD credit. However, if you receive a few thousand checkout page loads a month then its unlikely that you’ll hit that threshold. Even though it’s unlikely, you should still create budget alerts so that you don’t get hit with surprises. You should also BE SURE TO RESTRICT YOUR API KEY so that it only works on your website in the event someone or a bot tries to steal your API key for their own use and cause your billing fees to go up.
Creating Budget Alerts #
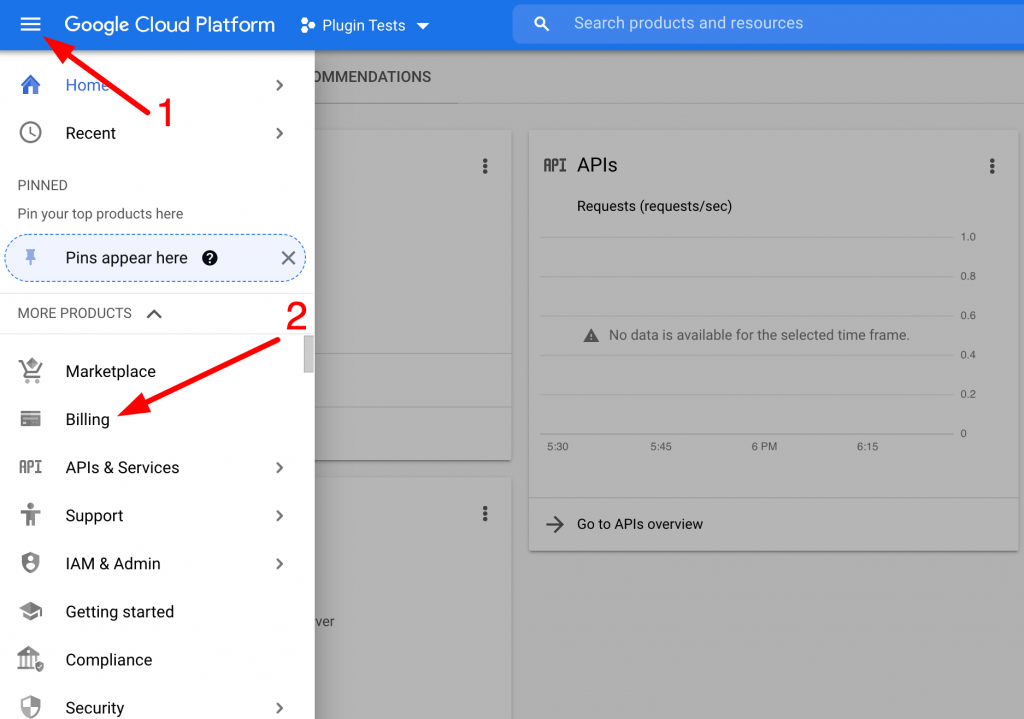
Step 1
Head over to https://console.cloud.google.com/ and log into your account or switch to the account where you have the project you created the API key for Kikote. Once there click the hamburger bar on the left and from the menu that appears select Billing
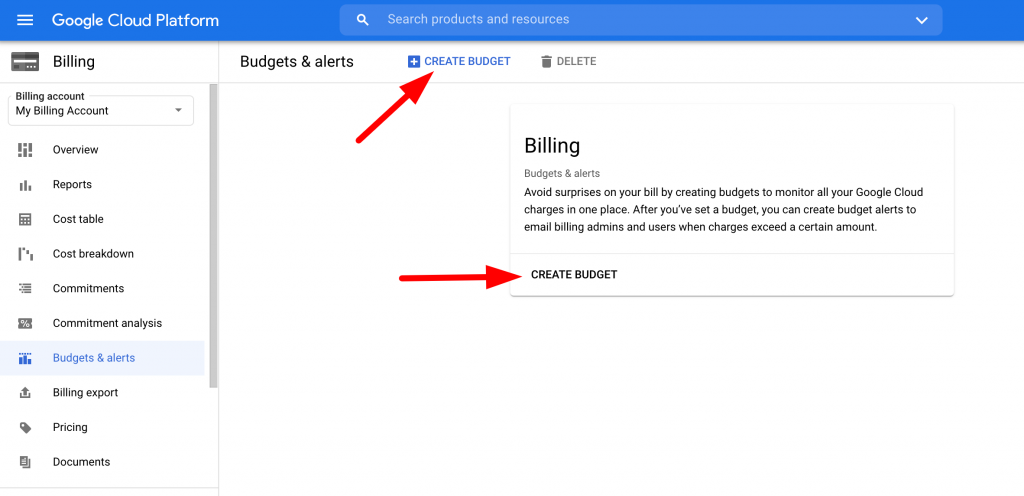
Step 2
After the page loads select “Budgets & Alerts” from the new menu on the left. If you have no budgets already created then you will get a prompt to create one. You can create a budget by clicking any of the two CREATE BUDGET buttons shown:
Step 3
Give the budget any name you wish and pay close attention to the other options shown. Make sure the Time range is set to Monthly and If you have more than one project under the account be sure to select the one where you created the API key for Kikote.
You may filter the services if you want but you might want to leave it at all services since you might add more services to the Kikote project in the future.
Under the Credits section uncheck the “Discounts” and “Promotions and Others” checkboxes; this is because you want to get alerted when your account is nearing the free $200USD credit and NOT after it has passed it:
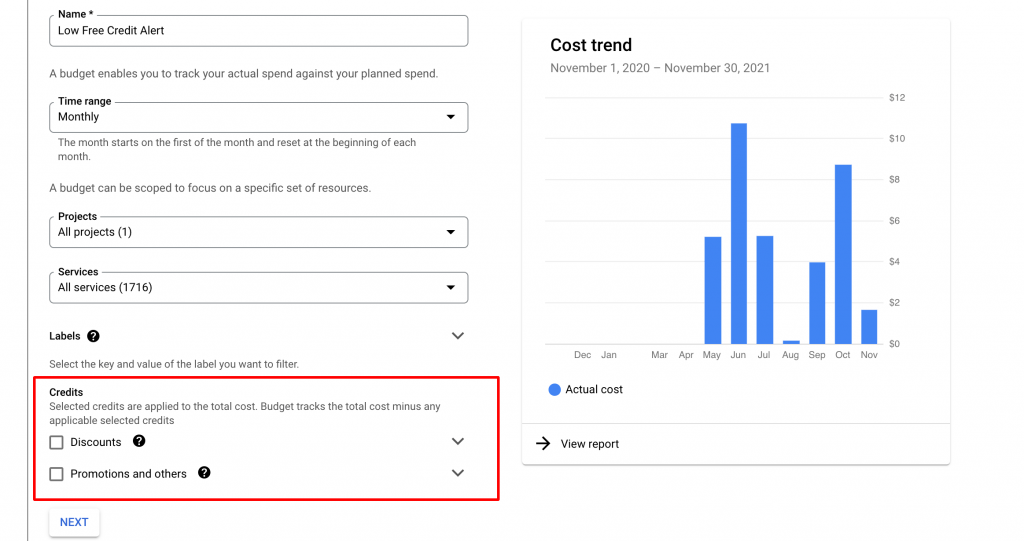
Click NEXT to move to the next section.
Step 4
Set the Budget Type to Specified amount and set the threshold at which you’d like to start getting alerted. A good value to set is 180 so that you’d have enough time to disable Kikote before the $200USD is reached. If you know you don’t check your email very often or you have a lot of traffic spikes, then you might want to set this value lower to something like 160 so that you can have time notice the emails from Google about your budget.
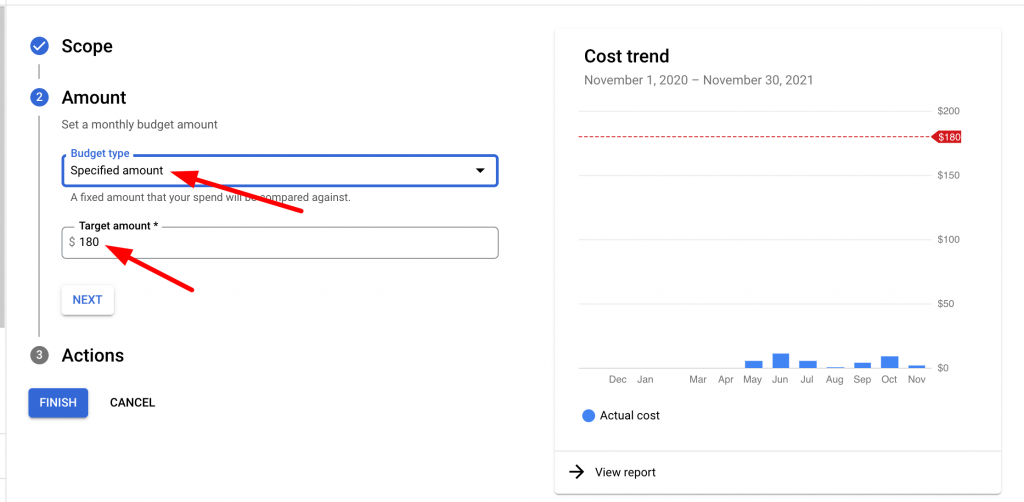
Click NEXT to proceed to the final option.
Step 5
In the actions section you can greater fine tune at which points you’d like Google to alert you about your budget. The defaults are usually fine but you can adjust as needed.
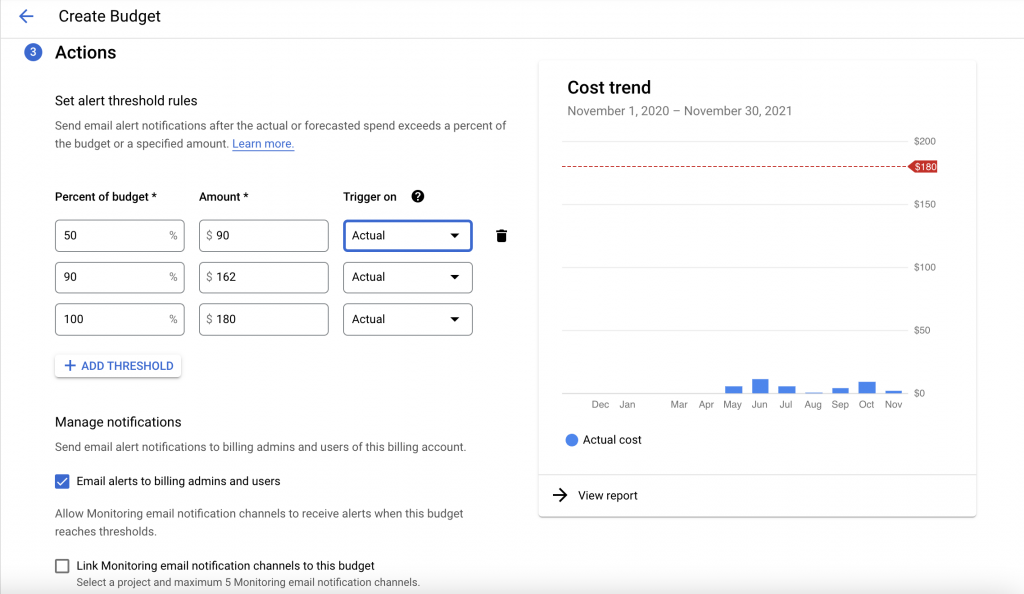
Once you’re done, click finish at the bottom of the page to finish creating your budget.
Creating this budget alert should not be seen as a way to prevent you from having to pay Google fees. Location Picker at Checkout for WooCommerce has been developed to only make use of the Google API when its needed and once you’ve restricted your key to only work on your website then it should be smooth sailing if you receive a few hundred/thousand map loads/uses a month.
In the end, if your website is receiving a great deal of traffic/usage and you go over the $200USD free credit every month then Good Job! You’ve done what many are hoping to achieve.


