How to Create Flexible and Dynamic Shipping Rates in WooCommerce
The shipping rates are an important element of the shopping experience for your customers, many times, the failure or success of the ordering process depends on the shipping rates.
You may have the best website, great user experience and good products, but if your shipping rates are not a good bargain for your customers, you might experience a lot of abandoned carts on your WooCommerce store.
WooCommerce itself comes with some basic shipping rates features which will allow you to create some basic shipping rates for your WooCommerce store. This default shipping feature will only work well if you are selling a single product or closely related types of products.
If you plan to sell various types of products and calculate complex shipping rates based on regions, distance, store locations and other conditions, then you will need the help of a WooCommerce shipping rates plugin like Kikote.
A WooCommerce shipping rate plugin will enable you to set up various shipping rates for your customers based on your predefined conditions such as distance, location and more. The plugin will calculate the shipping costs based on any of these criteria that you have configured on your store.
In this guide, we will look at how to create WooCommerce dynamic shipping rates that adjust based on different scenarios using the Kikote Location picker at the checkout plugin.
What are Flexible and Dynamic Shipping Rates?
Flexible and dynamic shipping is a shipping method that allows you to customize the shipping rates for different products based on different conditions or scenarios. A flexible shipping system enables online store owners to charge varying shipping rates from their customers, this will ensure that your customers can get a good bargain on their shipping fee.
Instead of a fixed rate for everyone, you can create a cost-effective shipping solution with flexible shipping. You can save money for yourself and your customers by tailoring the shipping rates to each product’s unique shipping requirements.
What is Kikote Plugin?
Kikote is a location picker at checkout plugin for WooCommerce, it allows store owners to add more flexibility to their WooCommerce store by adding more features to the checkout and shipping system of WooCommerce.
With Kikote, you can allow your customers to choose their exact delivery location during checkout, this will help to reduce friction in the delivery because you can always get the accurate shipping address from your customers.
The Kikote location picker at checkout plugin also allows you to set up flexible shipping rates on your WooCommerce store with various shipping methods and shipping zones. You can calculate shipping costs by distance, store locations, region and more.
If you are looking for a complete shipping and delivery solution for WooCommerce, then Kikote is your best bet.
That said, let us get into the nitty-gritty of setting up various dynamic shipping rates on our WooCommerce store using the Kikote plugin.
How to Create Flexible Shipping Rates in WooCommerce
In the sections below, we will cover all the steps required to set up a flexible shipping solution on your WooCommerce store. We will install and activate the Kikote plugin, set up shipping methods and create some flexible shipping rates on our store.
Install and Activate Kikote
The first step in this process is to install and activate Kikote, which can be done from your WordPress dashboard.
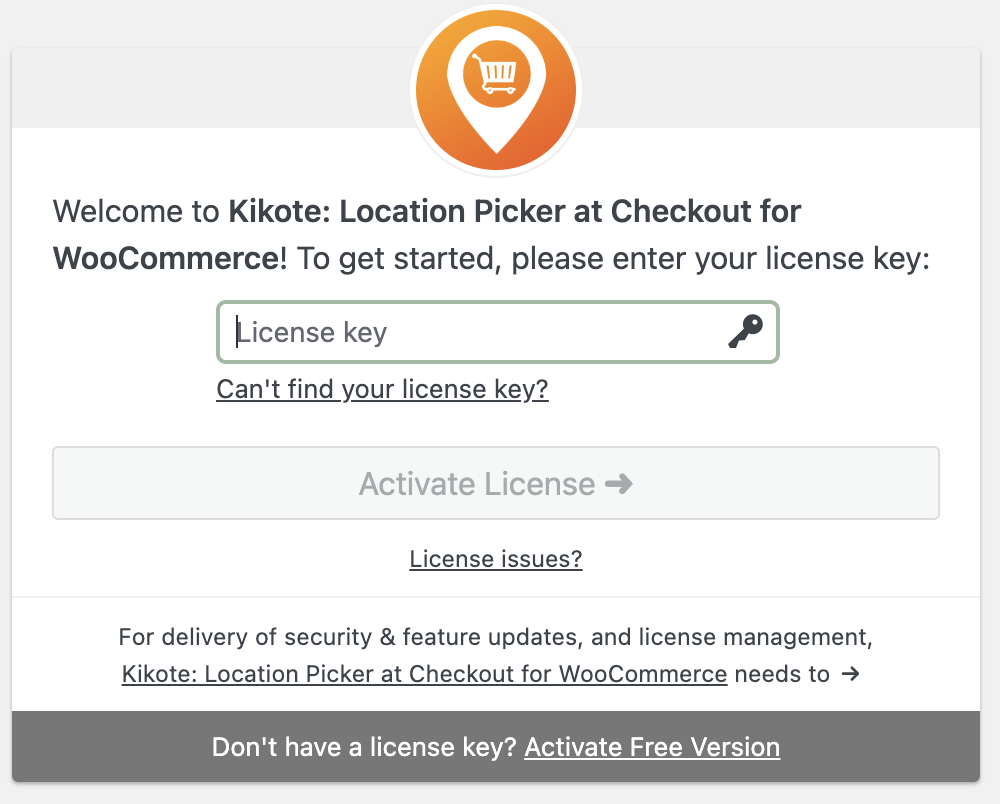
You will need to purchase a Kikote license and install the Kikote plugin. To do that, head to the Kikote website to purchase a suitable license plan. After purchasing your copy of Kikote, you will receive a confirmation email with your license key and a link to download the plugin zip file.
Once you have downloaded the plugin, login to your WordPress dashboard and navigate to the plugins page; click on “Add New” and select “Upload Plugin”. Upload the plugin zip file, click on “Install Now” and then activate the plugin.
The next step is to activate your license key by providing the license key that you received through Freemius and you will immediately have access to all the wonderful features of the Kikote plugin.

Configure Kikote
Before we start setting up our flexible shipping rates, there are some basic configurations we need to do for Kikote to function properly.
Navigate to WooCommerce > Settings > Location Picker at Checkout from your WordPress admin dashboard, and you will be presented with some settings options that you can customize. The most important setting here is the Google Maps API key.

On this settings page, you need to add a Google Maps API Key, this is very important because the plugin requires the Maps API key to perform its functions. You can click here for a detailed guide on how to get your Google Maps API key.
You can also look through the other setting options and activate any other features that you will like to have on your WooCommerce store.
Setup Shipping Methods
A shipping method is very crucial to the WooCommerce shipping process. Shipping methods are attached to shipping zones in WooCommerce, so you need to set up the shipping methods that apply to your store.
Navigate to WooCommerce > Shipping, click the “Add a Shipping Zone” button, then create a general shipping zone for all regions or create a specific one for your country and attach a Shipping Method to it with any name that you like.
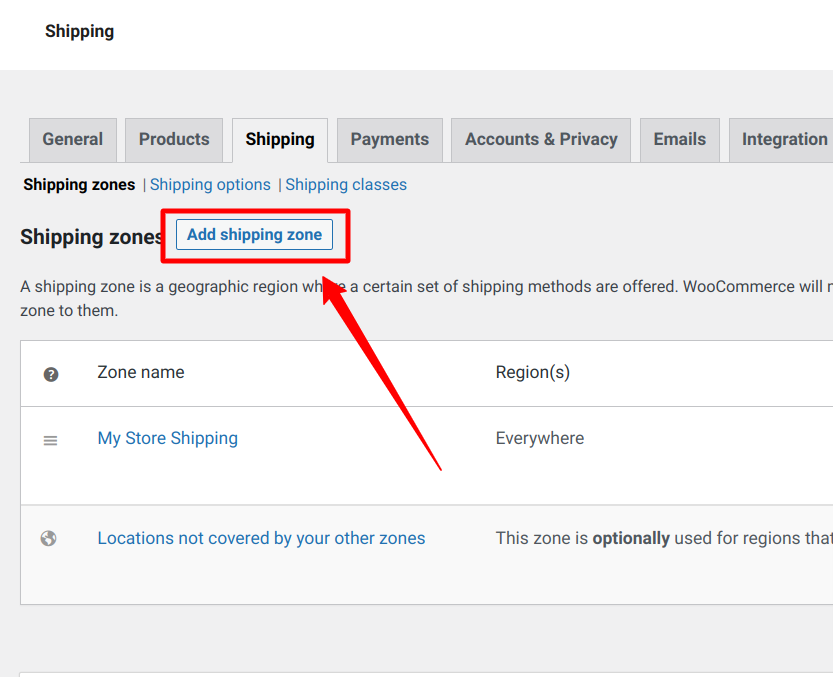

Once we have this configured, we will be able to use the Shipping Workflows in Kikote settings and attach our created shipping method to the Workflow we choose.
How to Create Shipping Costs by Region
The Shipping Cost by Region feature for WooCommerce in Kikote allows you to draw regions on a Google map and set prices for them. When a customer falls within any of your drawn regions, WooCommerce will automatically update the shipping method to reflect the cost set for the shipping region.
To get started, navigate to WooCommerce > Settings > Location Picker at Checkout > Shipping.
On the Kikote shipping page, you will find three (3) distinct shipping workflows there, they are Cost by Region, Cost by Distance and Cost by Store Location. It is recommended that you only use one shipping workflow at a time to avoid unexpected shipping costs or issues.
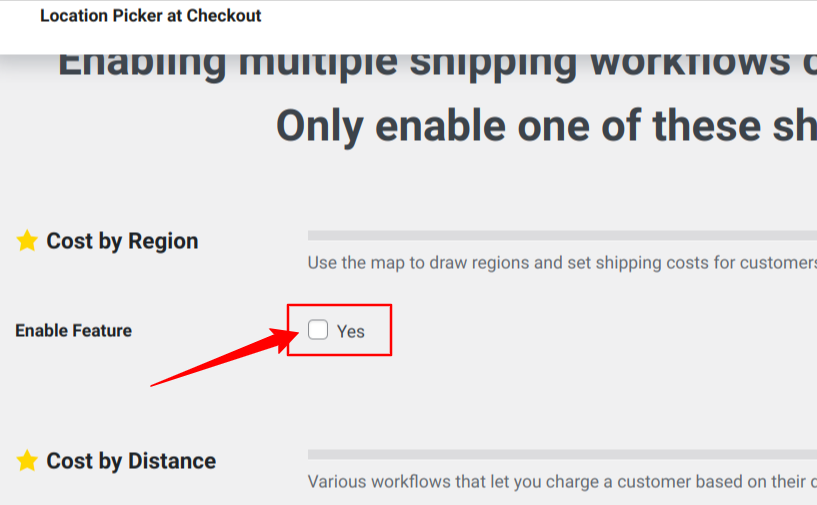
This section is focused on the “Cost by Region” option, so let us tick the box to enable this feature.
After checking the box, some new settings options and a Google map will show on the page, we will be using this map to draw a shipping region for our store. Click on the “Draw a Shape” icon to begin drawing a shipping region on the map.
Follow the prompts to save your drawn region and you will see your region highlighted on the map.
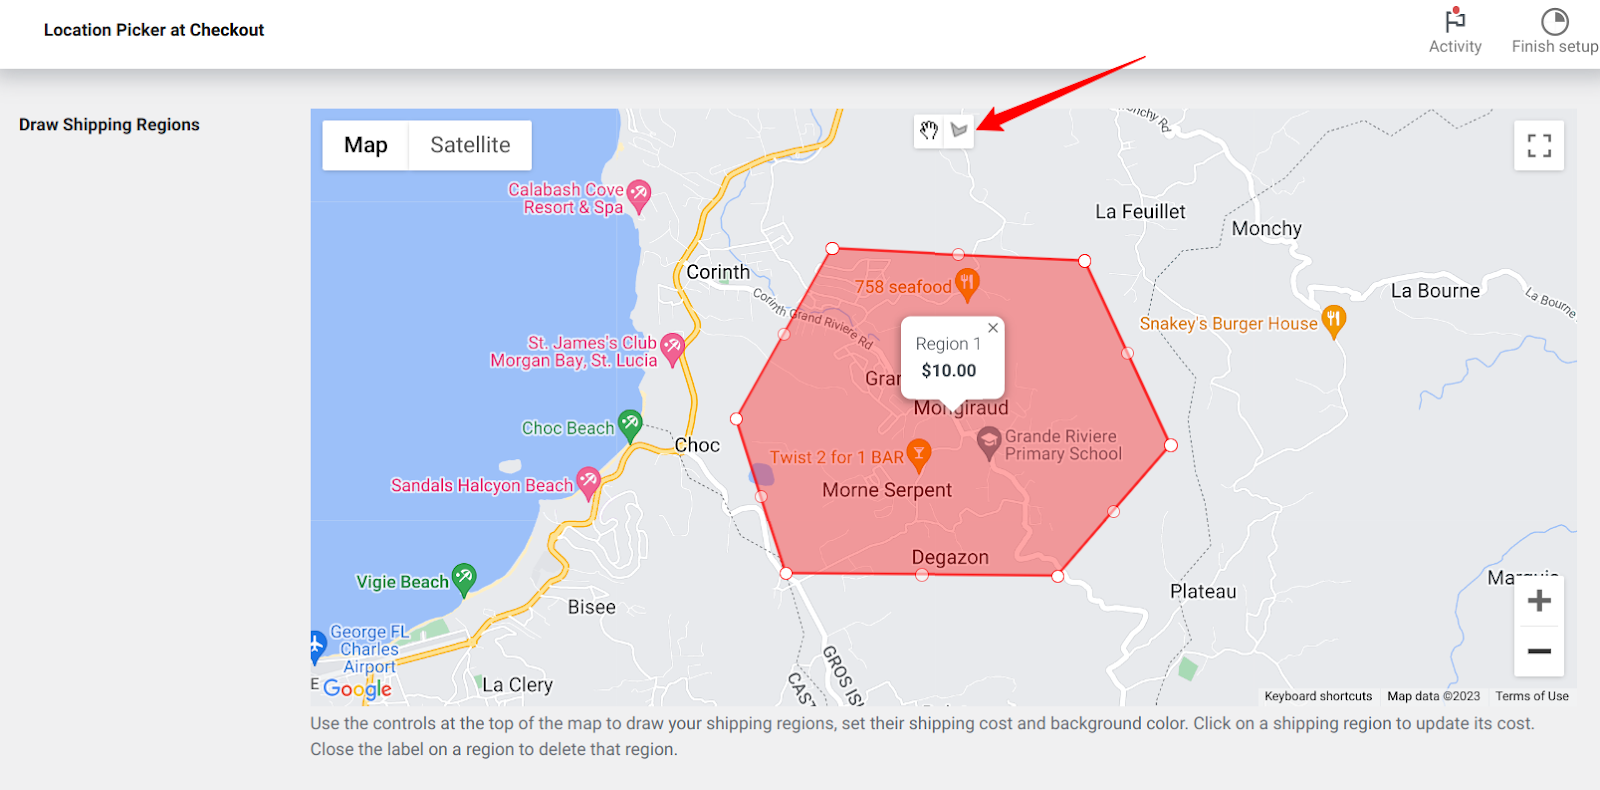
Next, select the shipping methods that this region applies to. Remember we created the Shipping Zone and method in the step above.
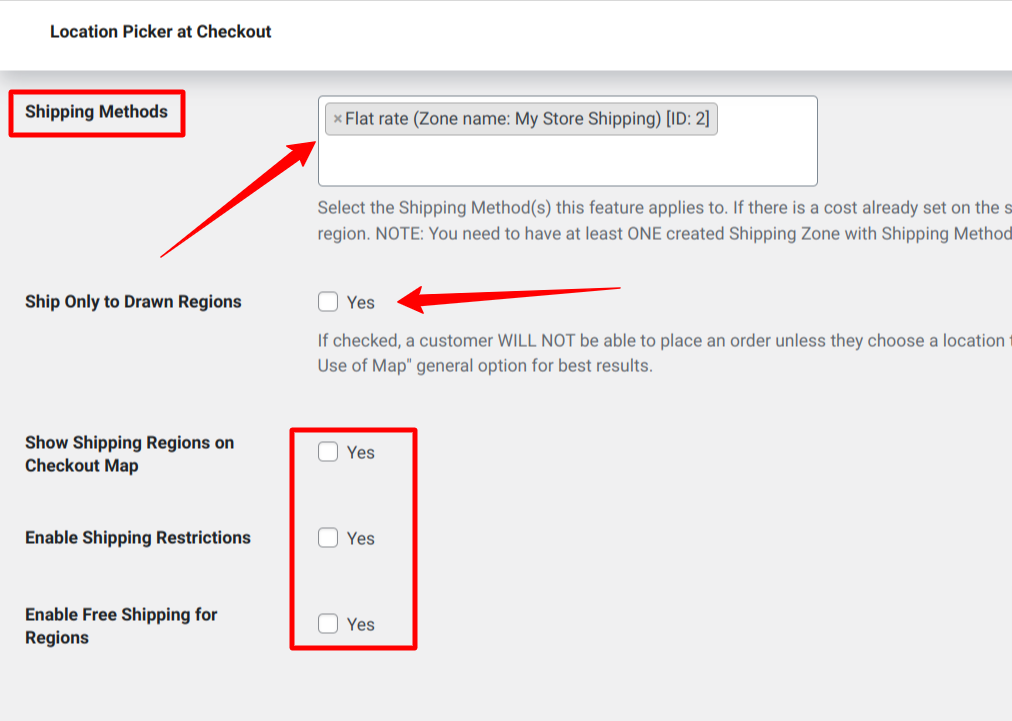
You will find other settings options under the shipping costs by region feature, you can choose to activate or deactivate these options based on your preferences. I will recommend you enable the “Show Shipping Regions on Checkout Map”, this will ensure that your shipping regions are visible on the map.
Scroll down to click the “Save Changes” button when you are done to apply all changes to your store.
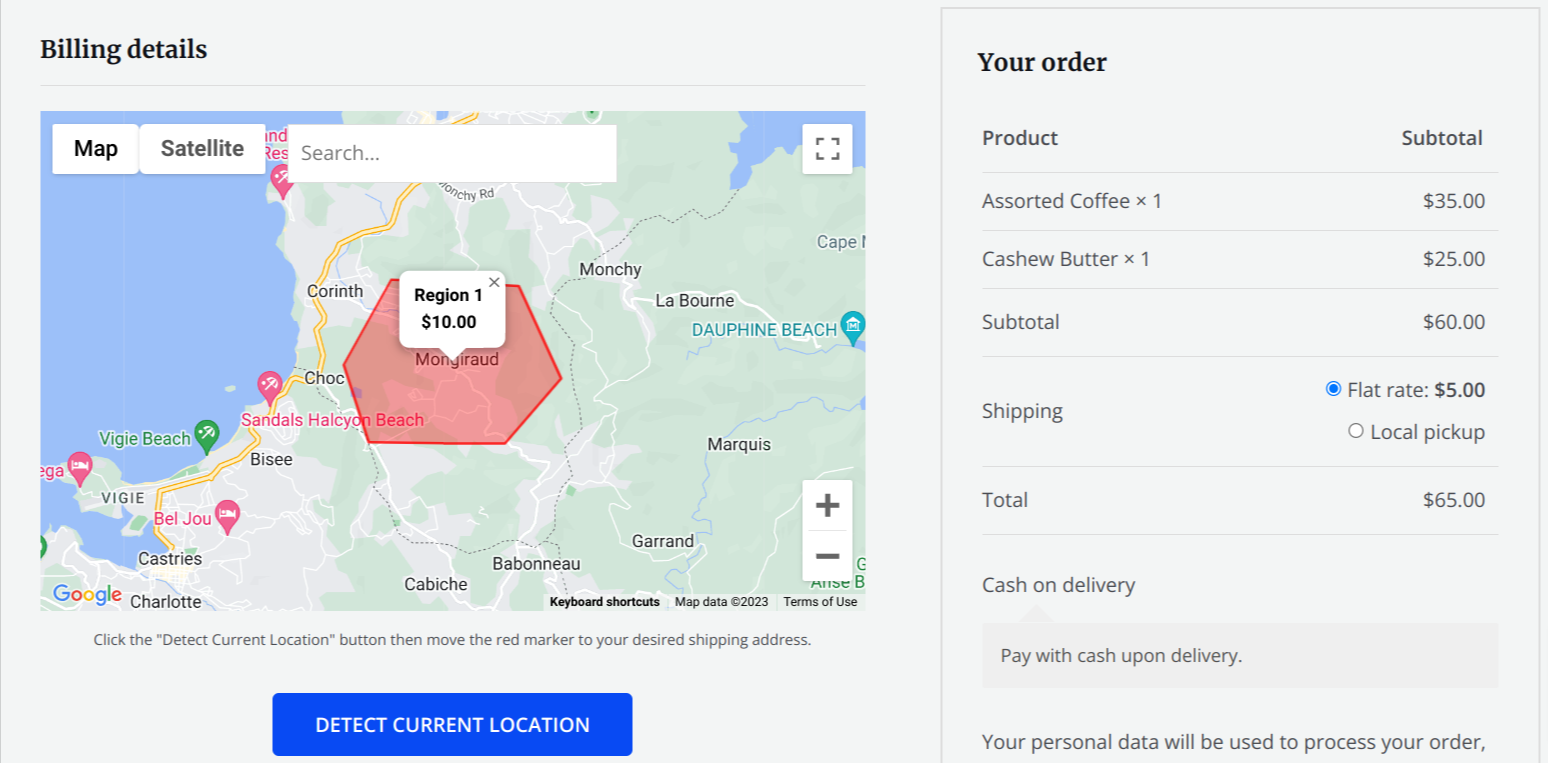
As you can see in the image above, the shipping region and the shipping rates will be shown on the WooCommerce store checkout page.
Please note that If a customer falls within two or more regions that intersect, Kikote will use the highest shipping cost available.
How to Create Shipping Costs by Distance with Kikote
The Shipping Cost by Distance feature for WooCommerce in Kikote allows you to configure the shipping rates based on the distance from a pickup or shipping location to the customer’s location.
You will be able to set a specific cost per kilometre or mile which will be calculated automatically at checkout.
Firstly, you need to set up the Google Distance Matrix API key. You can find more information and a video tutorial on how to do it here.
To get started, navigate to WooCommerce > Settings > Location Picker at Checkout > Shipping.
On the Kikote shipping page, you will find three (3) distinct shipping workflows there, but for this section, we will only activate the Cost by Distance Shipping workflow.

Tick the checkbox to enable this feature and also provide your Distance Matrix API Key obtained from your Google Cloud console.
Also, you need to set the origin coordinates, this is the start location from which the plugin will start calculating the distance to your customer’s location.
Next, select the shipping methods that the Cost by Distance Workflow applies to. Remember we created the shipping region and method in some steps above.
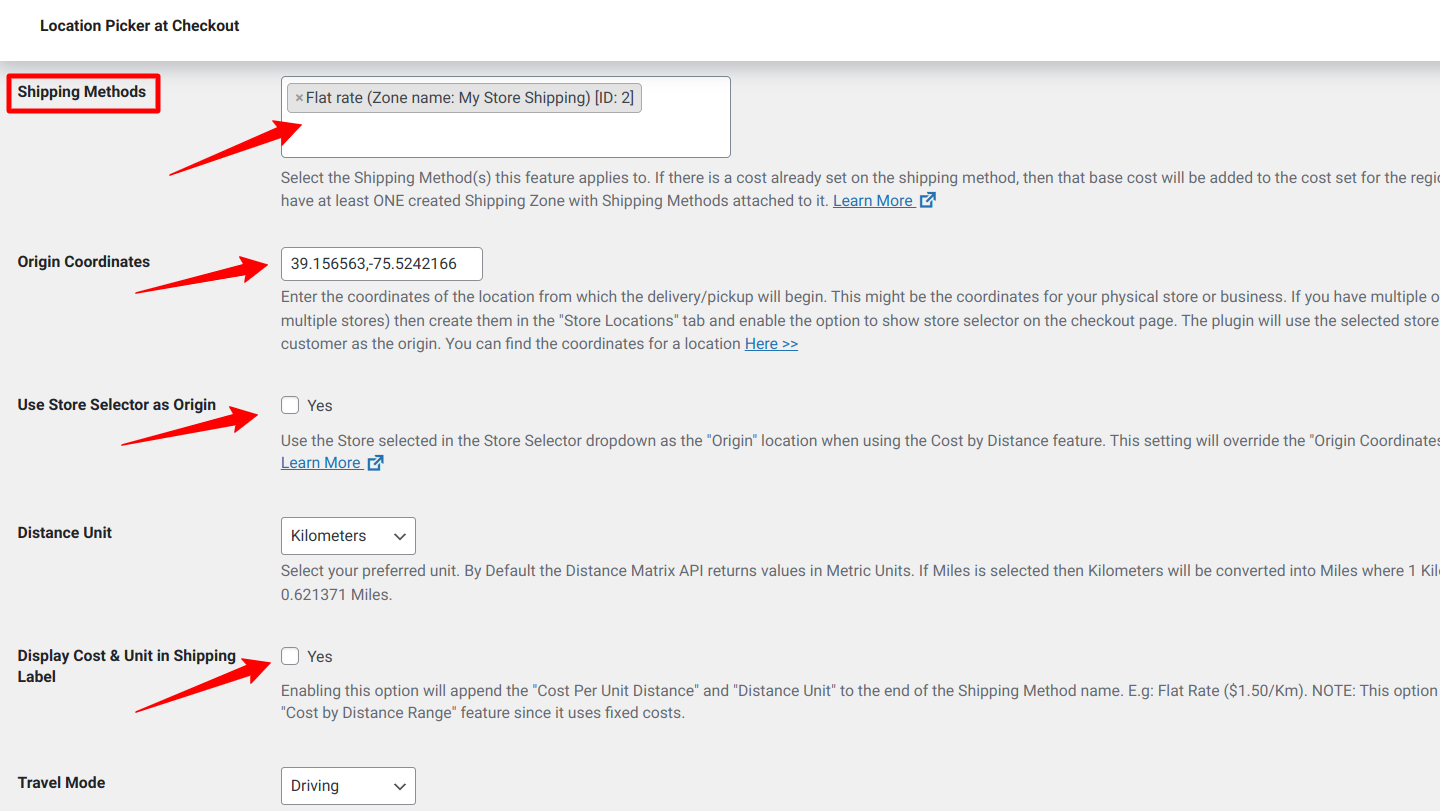
You will find other settings options under the shipping costs by distance feature, you can choose to activate or deactivate these options based on your preferences; I will recommend you configure all of these options to maximize your shipping efficiency.
The Shipping Cost by Distance comes with three sub-workflows that will help you to fine-tune your shipping calculations, you need to choose at least one of these so that Kikote knows how to go about calculating your shipping cost by distance. The available sub-workflows are:
Standard – Charge customers a shipping fee based on the distance between your store(origin) and their location (destination).
Distance Range – Create your distance ranges and set the price based on the range the customer falls into.
Store Distance – Distance of the customer away from a given store that they select during checkout.
You can choose to enable any of these features based on your specific need. Once you are satisfied with your configurations, click on the “Save Changes” button to save your flexible shipping rates.

As you can see in the image above, the customers can auto-detect their location or manually enter their address into the map and Kikote will calculate the shipping fee based on their distance from your Origin (Start) location.
How to Create Shipping Costs by Store Location
Aside from Cost by Region and Cost by Distance, Kikote also allows you to create fixed shipping rates based on your store locations. This is a very useful feature for a business with multiple store locations, this will enable customers to get a cheaper shipping rate by choosing the store nearest to them.
NOTE: It’s also possible to give customers the option to select the store they’d like their order to be delivered from in any of the previously mentioned workflows. To do that you’d have to make use of the “Shipping Locations” feature in Kikote’s settings.
You can create entries from your saved store locations and set the flat rate for shipping from that store location to the customer. This setting doesn’t rely on any customer location information, it simply sets the shipping price based on the store the customer selects on the checkout page.
Please note that you need to have store locations created to populate the “Select store” dropdown. Please check out How to Create Store Locations.
To get started, navigate to WooCommerce > Settings > Location Picker at Checkout > Shipping. Scroll down to activate the “Cost by Store Location” option.
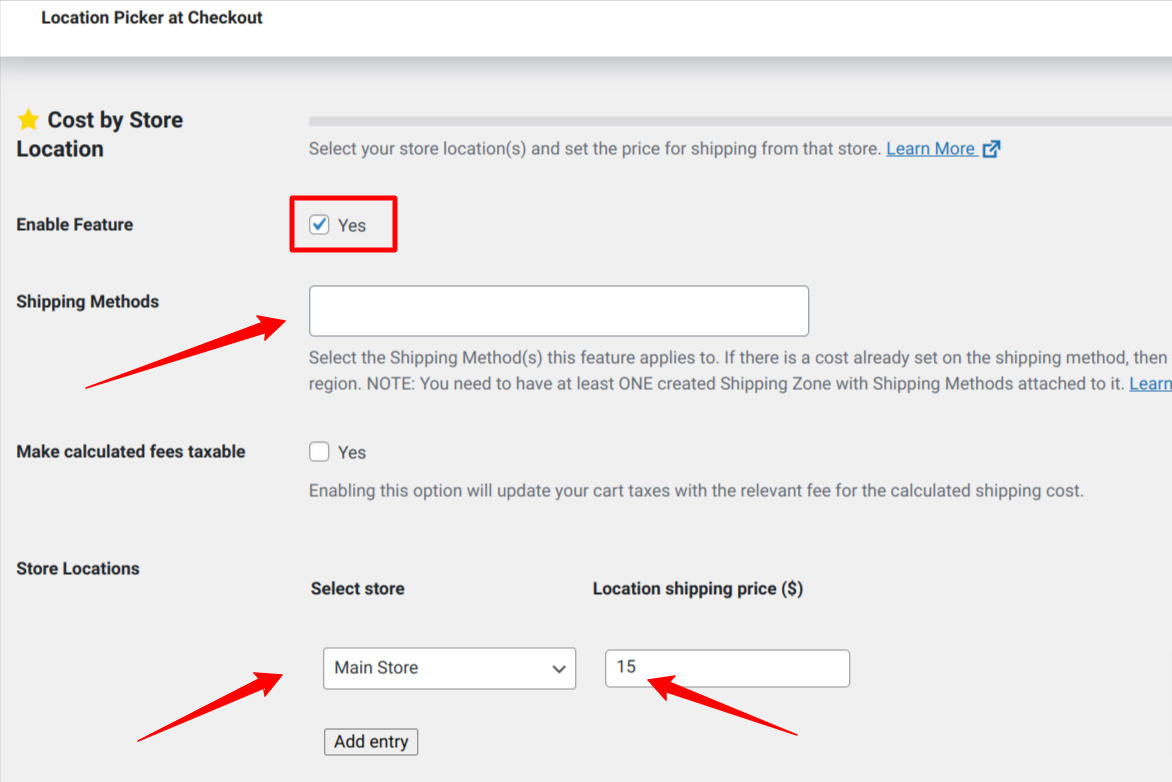
Tick the checkbox to enable this feature.
Next, select the shipping method that this region applies to. Remember we created the shipping region and method in some steps above.
Next, choose your store locations, you can select as many stores as you have from this section. These stores will be shown to your customers on the checkout page and they will be able to pick from this list.
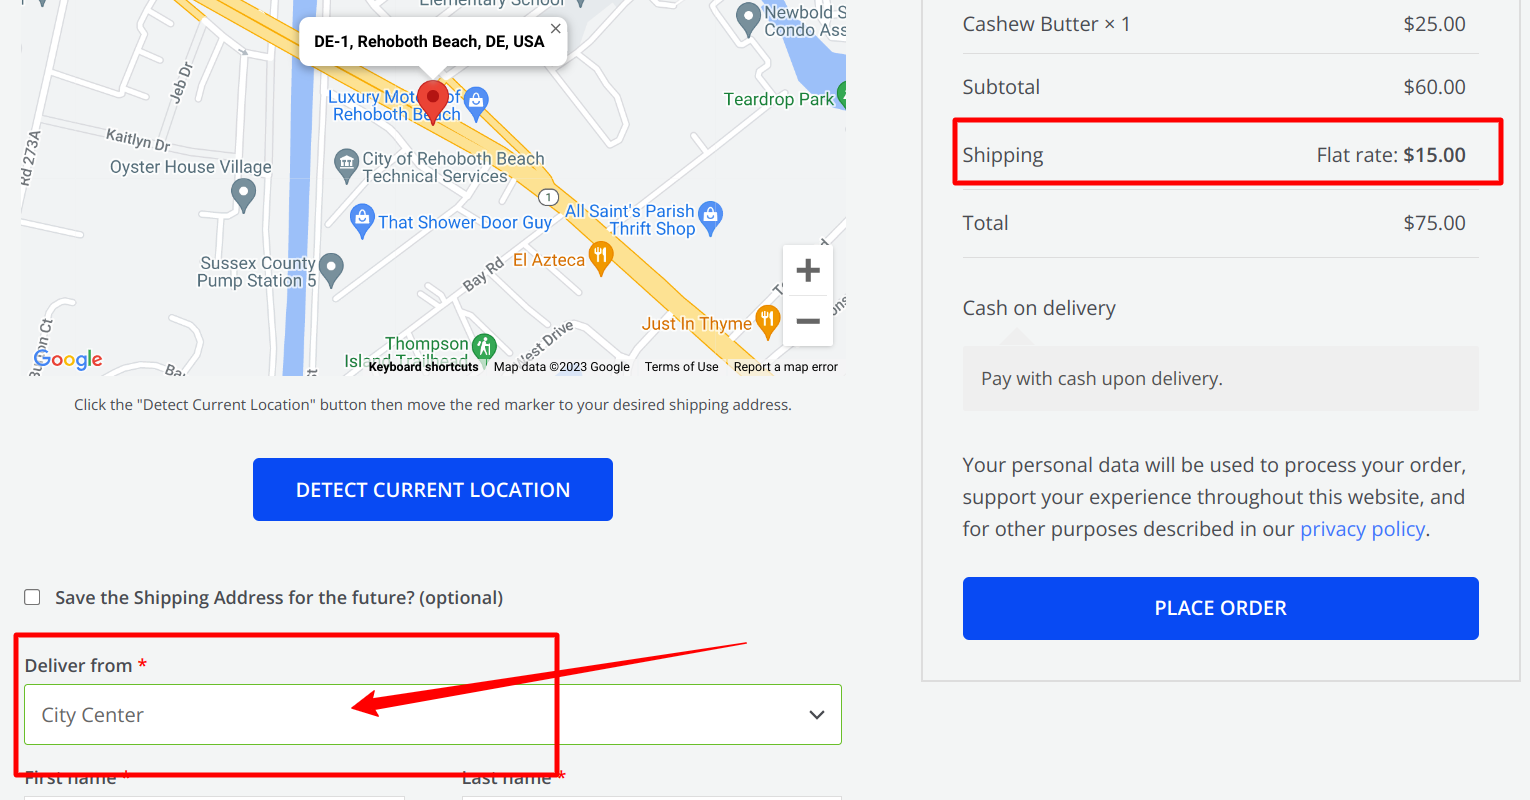
As you can see in the image above, the customers get a flat rate as the shipping fee depending on the store location they choose.
Conclusion
Flexible shipping rates can be a game changer for your WooCommerce store especially since most customers are on the lookout for great shipping bargains, a dynamic shipping rate will enable you to offer the best shipping costs for each order on your store.
Adding flexible and dynamic shipping rates to your WooCommerce store does not have to be hard, with a plugin like Kikote, you can easily set up a flexible shipping rate for your store in a short time. If you own a WooCommerce food delivery website, I will recommend you give Kikote a spin, Kikote offers you all the tools you need to supercharge your checkout and delivery system without any coding or a huge learning curve.
Leave a Reply